Creating your first iOS App with SwiftUI
This guide is for beginning mobile app developers. You will need a Mac computer, running a recent version of Xcode. The version of Xcode used in this guide is 14.1 (December 2022).
At the end of this short tutorial, you will have built your first iOS app and run it on the iOS Simulator to see what it would look like on a phone.
UIKit vs SwiftUI
Apple supports two different ways of building the user interface for iOS applications, UIKit and SwiftUI. The UIKit framework is the original iOS user interface development technology. SwiftUI is a newer framework that is similar to the React Javascript framework for web. You can use them together, but for beginning programmers, it's best to start with one or the other.
This tutorial uses SwiftUI, but we also have a very similar tutorial that uses UIKit. When you are just starting out, my suggestion is to try both of them out, and see which one you prefer.
Install Xcode
If you don't have Xcode yet, download Xcode from the Mac App Store, and then open it up. It will offer to install additional components, which you will need to let it do. This can take a while.
You can also install a specific version of Xcode from the Apple Developer portal, if you need to go back to a previous version.
Open Xcode
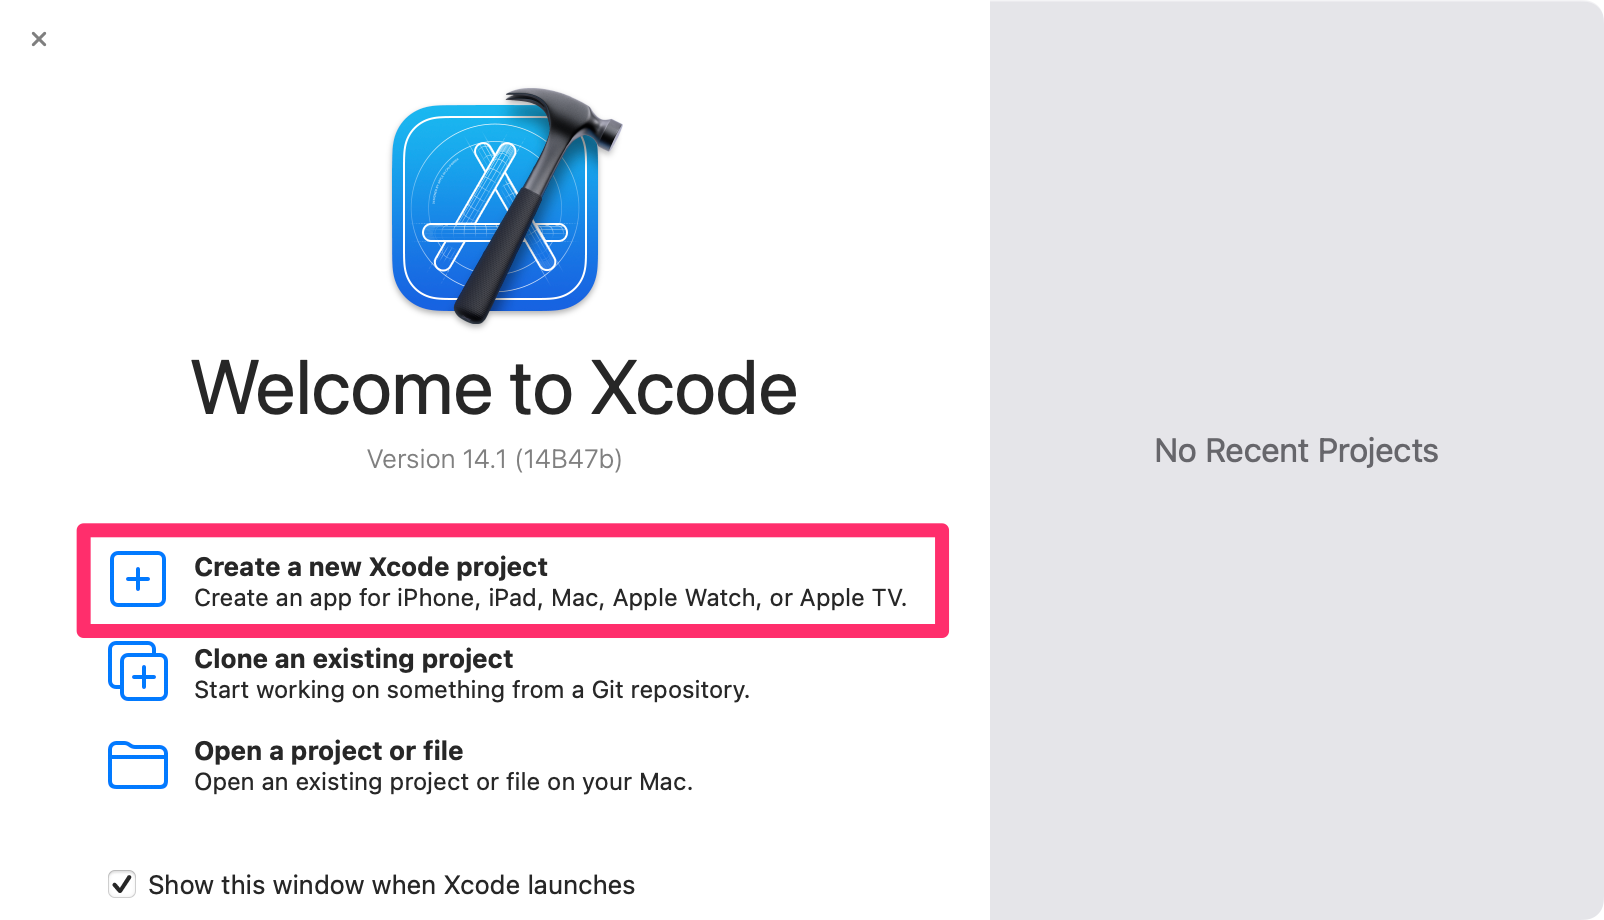
Once you have Xcode installed, start it up. You'll see a friendly Welcome to Xcode window appear.
We will be creating a new Xcode project, so choose the first option on the Welcome window.
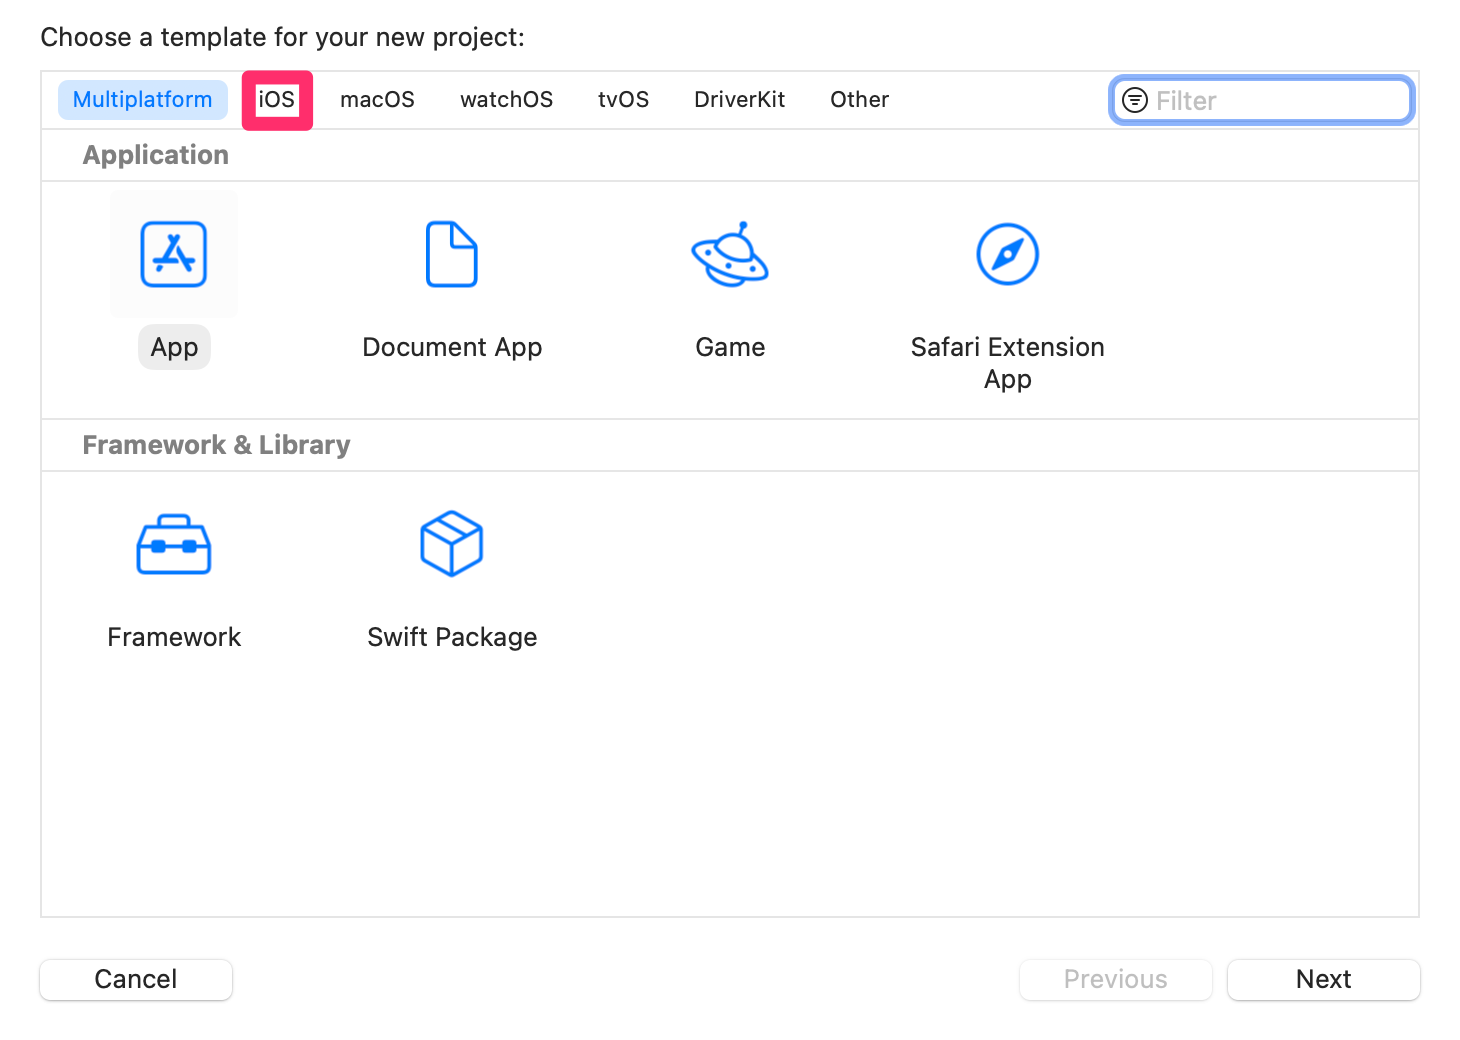
Next, a list of project template appears. Xcode will default to showing a Multiplatform app as the default, but we want to choose iOS in the small tab bar at the top of the window.
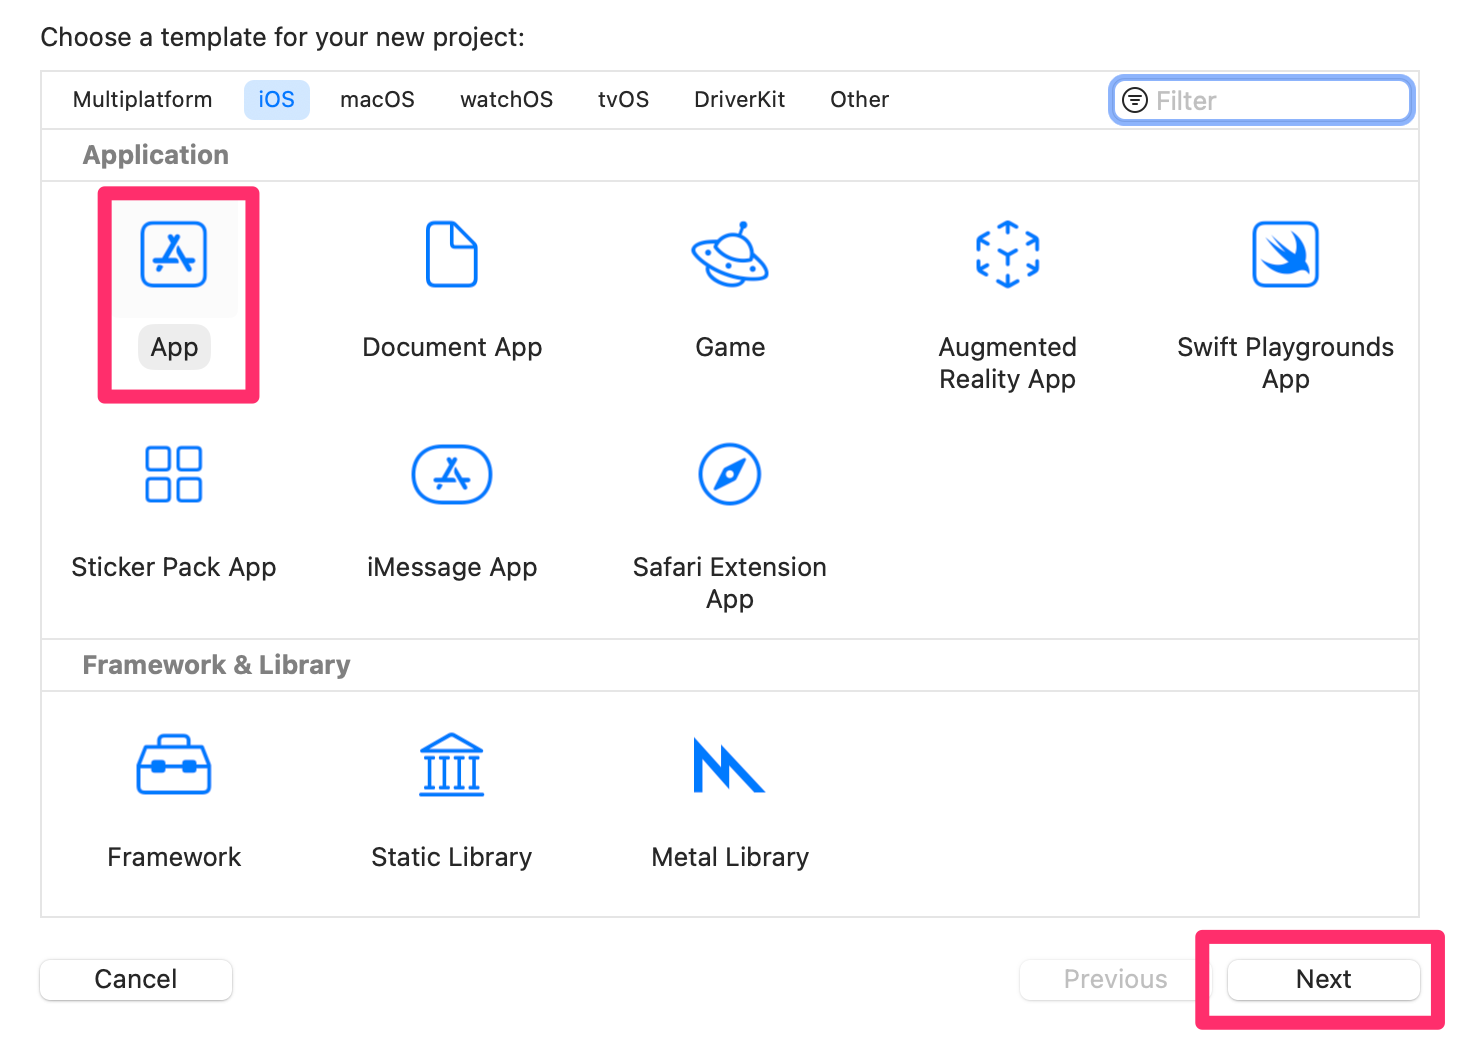
After choosing iOS, you will see a different list of templates - we are building an app, so click App and then click Next to move on in the process.
Xcode Project Options
After choosing one of the Xcode templates, you will need to fill in some details about your project. The three things you need to do are:
- Pick a project name
- Use an organization identifier
- Make sure the interface is
SwiftUI(notStoryboard)
The project name can be FirstSwiftUIApp or something similar. The organization identifier should be a domain name you control, in reverse order - such as com.buildingmobileapps or com.jefflinwood. If you don't have your own domain, you can make one up that is unique.
Xcode will initially default to using SwiftUI as the interface technology, instead of UIKit. If you create a project with Storyboard/UIKit, that will be the default until you change it.
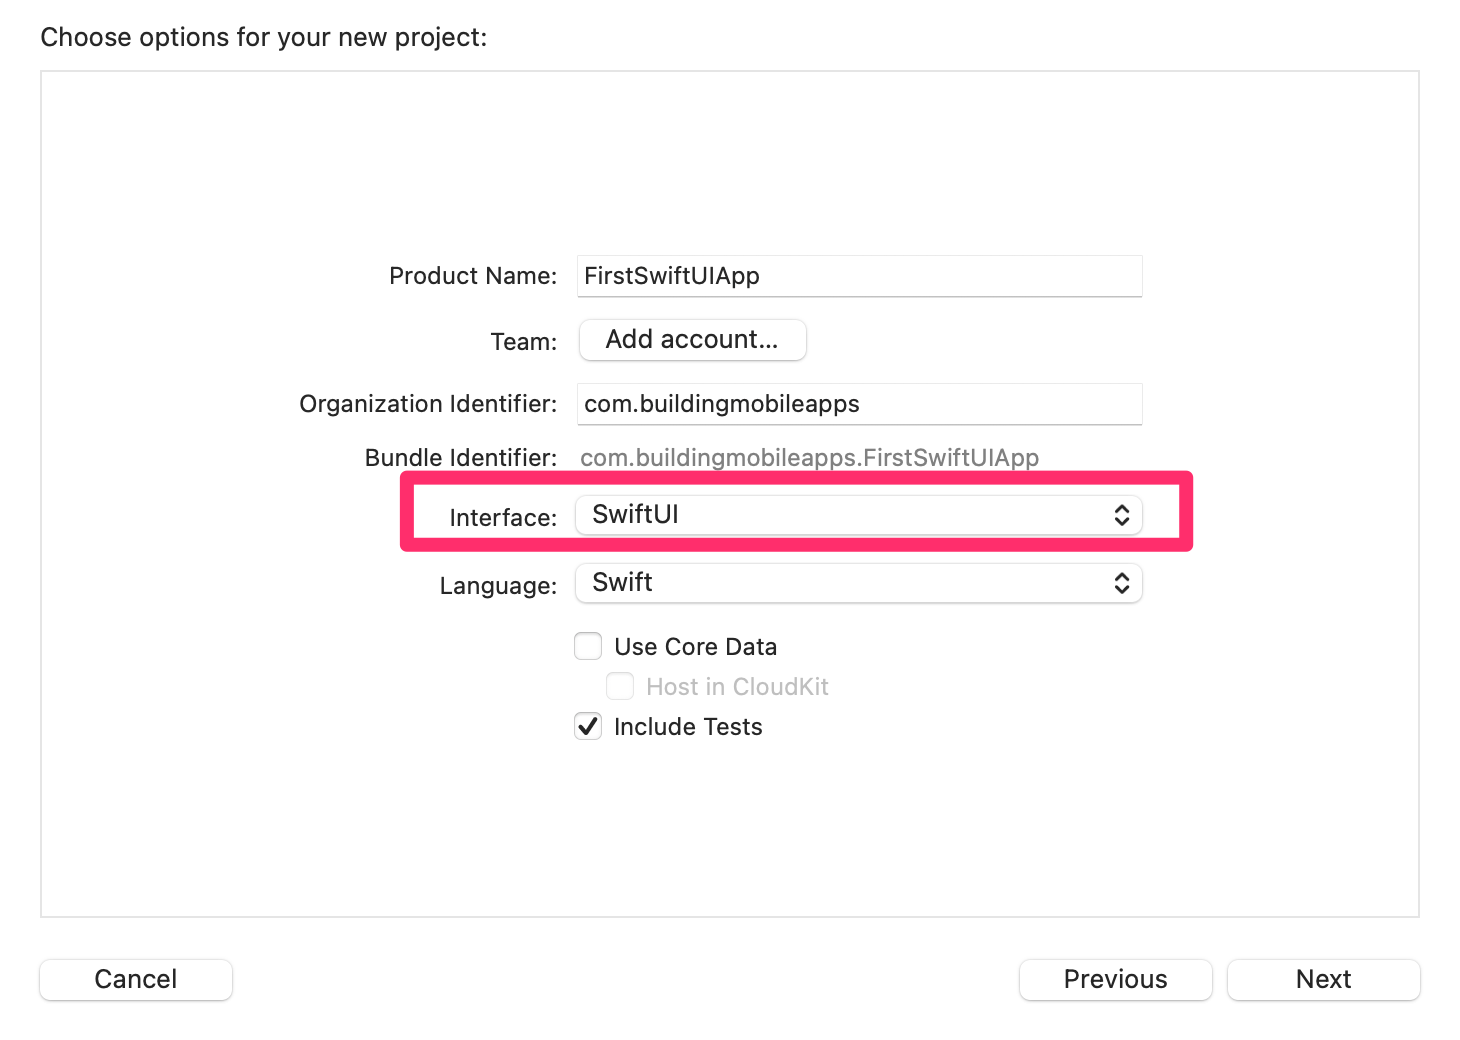
Fill in the project name and organization identifier, choose SwiftUI as the Interface, and then click Next.
Xcode will offer to save your project on your Desktop - you can put it wherever you like. The checkbox for creating a Git repository on your Mac will be checked. We won't be using Git in this guide, but we recommend that you leave this checked by default.
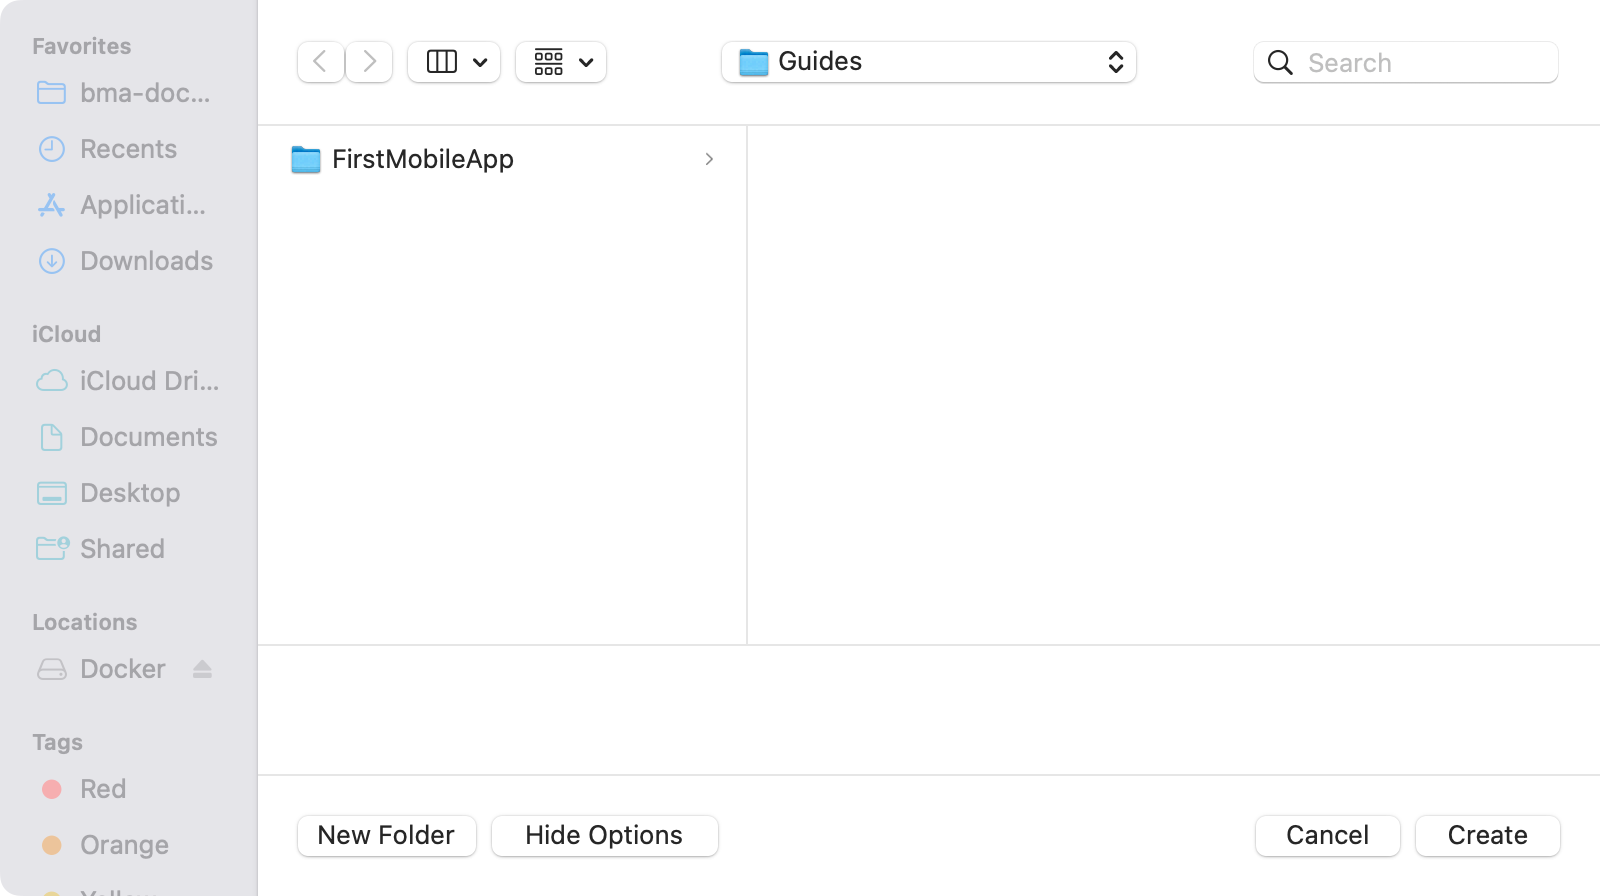
Save the project by clicking Create, and then Xcode will open your new project.
The SwiftUI Project in Xcode
After saving the project, Xcode will open up your project, starting with the ContentView.swift file. You may see your computer doing a lot of processing - Xcode will show you a live preview of your SwiftUI View, but it can be slow to start initially. After Xcode finishes what it needs to do, your Xcode window will look similar to this:
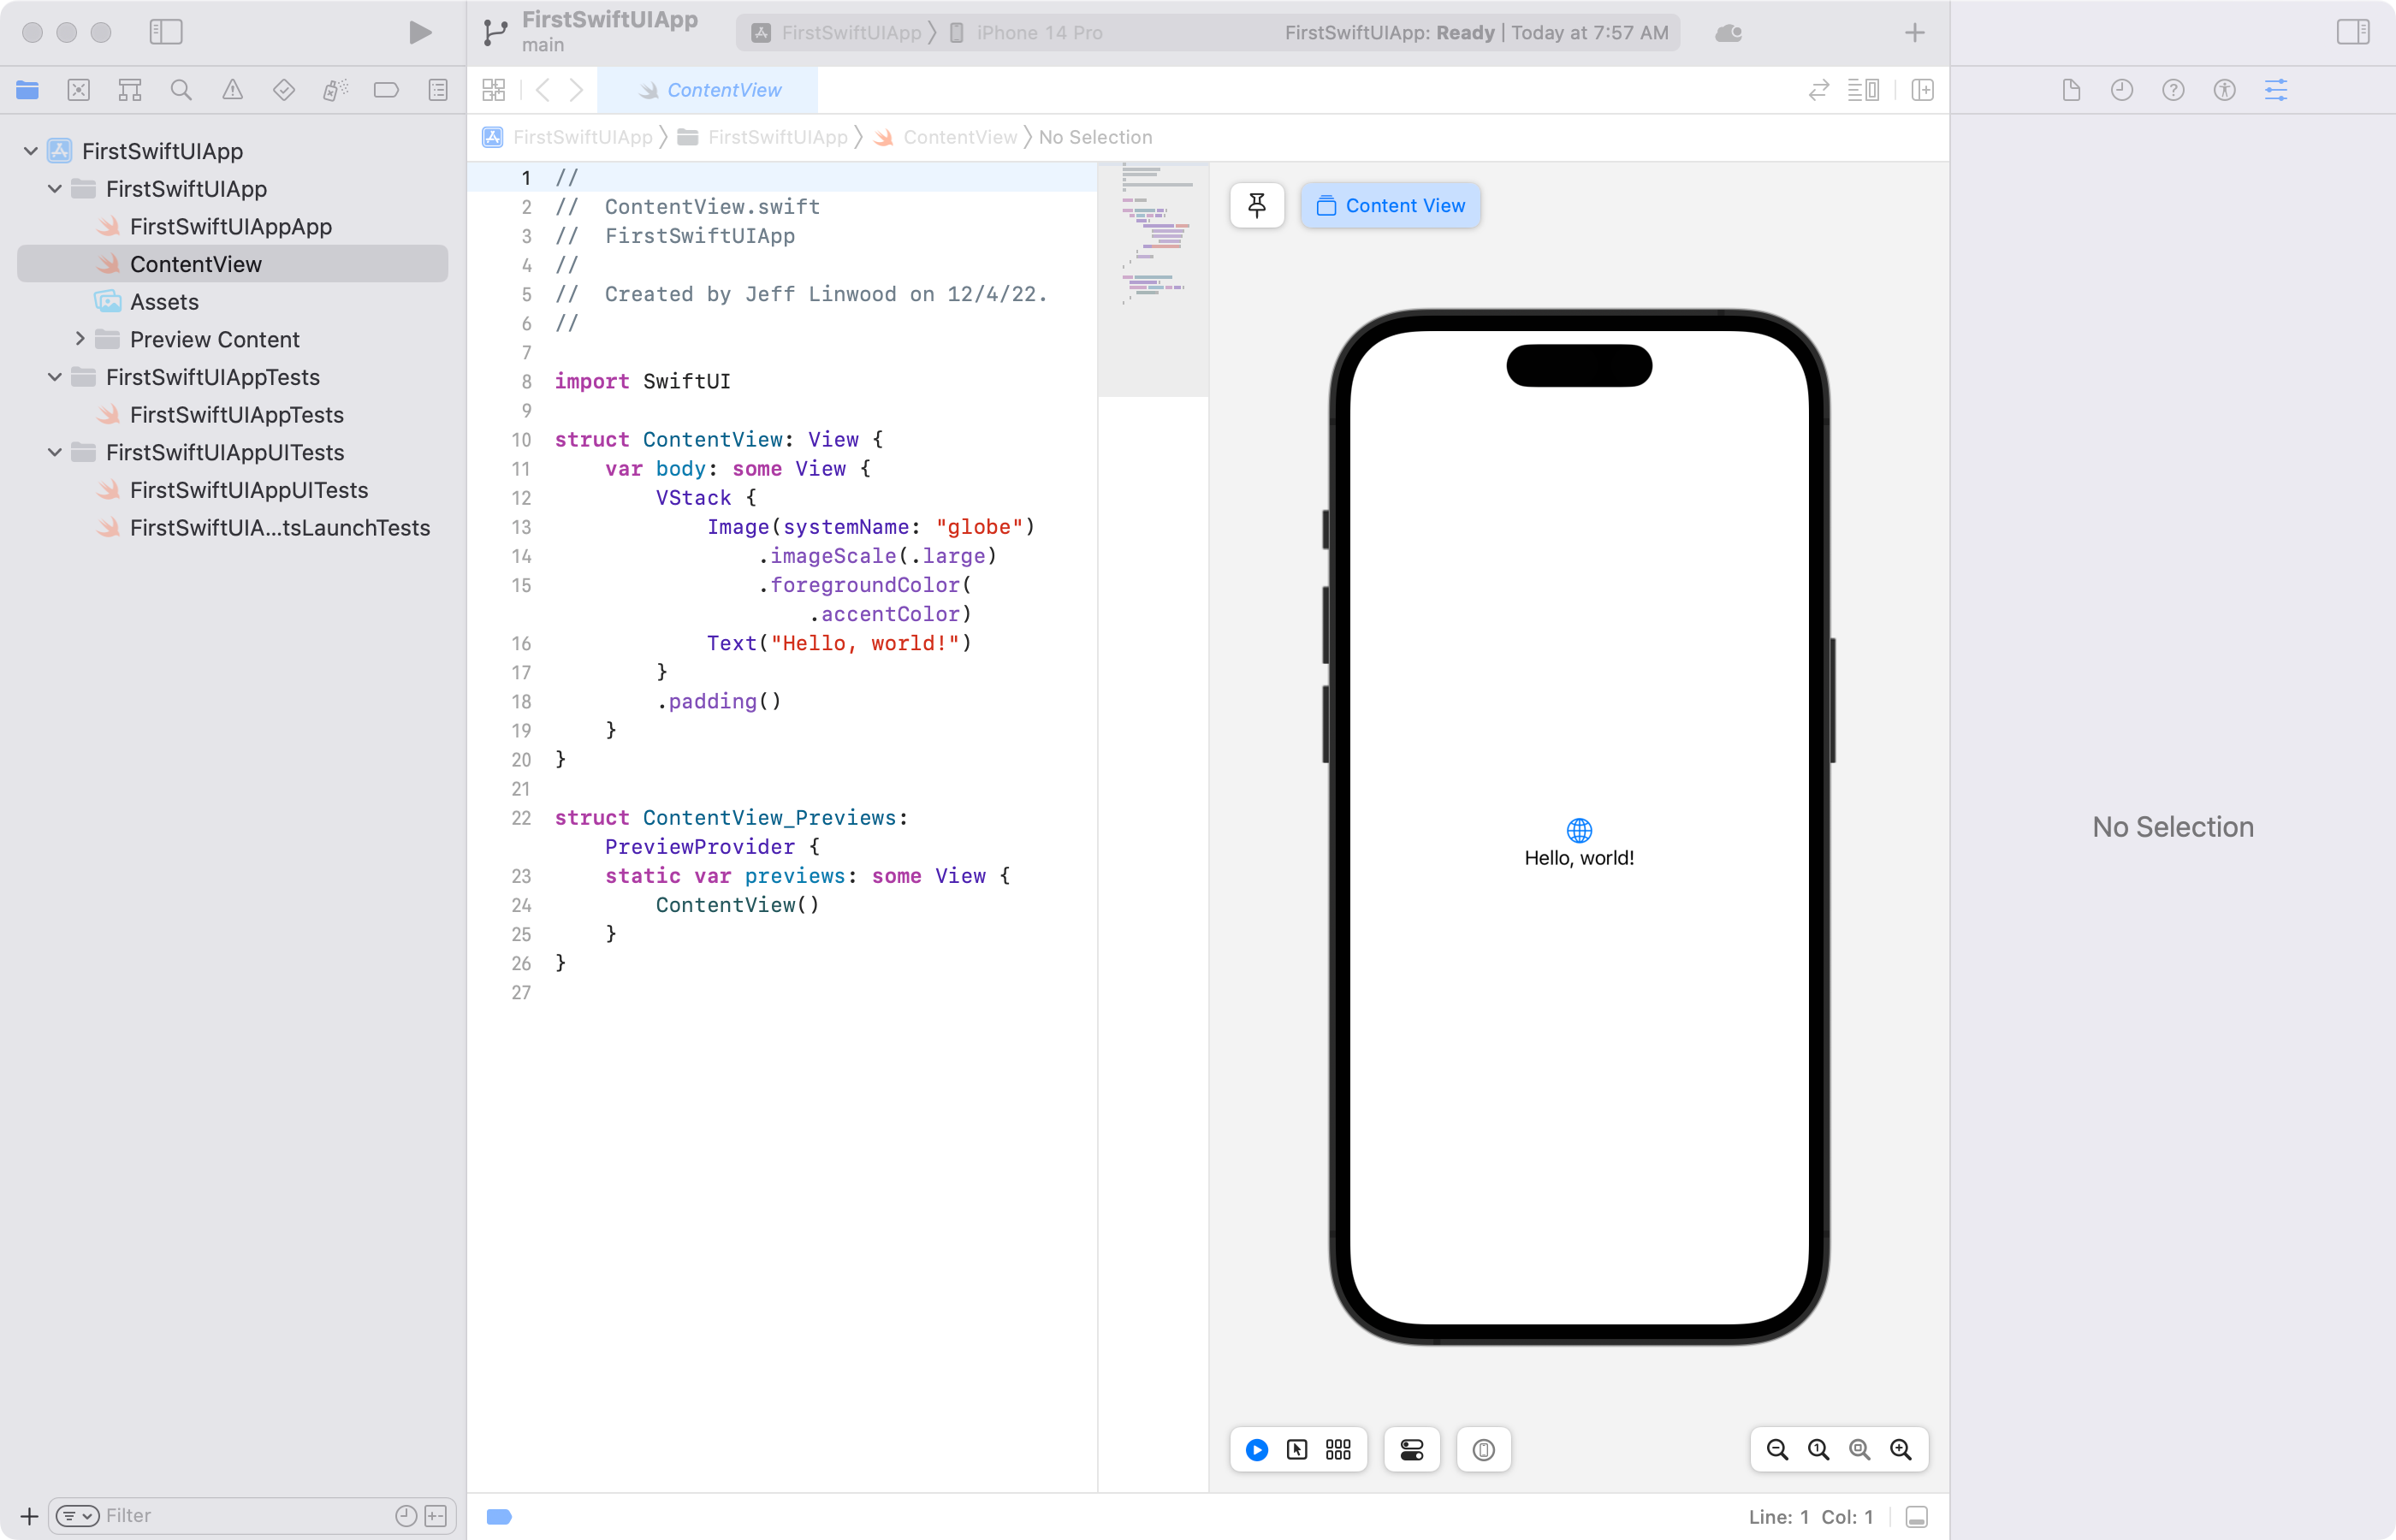
With SwiftUI, we write all of our user interface as Swift code - it is not the same Swift objects we used for UIKit and Storyboard development. Taking a look at the project we generated, we have two important files:
FirstSwiftUIAppApp- the main applicationContentView- the only screen in our app
We won't need to modify the FirstSwiftUIAppApp file, but taking a look at the code that Xcode generated, we can see that the ContentView gets loaded from this file:
import SwiftUI

@main
struct FirstSwiftUIAppApp: App {
    var body: some Scene {
        WindowGroup {
            ContentView()
        }
    }
}
If we dig into the ContentView that Xcode created, we can see that the code describes the user interface we are seeing in the live preview:
import SwiftUI

struct ContentView: View {
    var body: some View {
        VStack {
            Image(systemName: "globe")
                .imageScale(.large)
                .foregroundColor(.accentColor)
            Text("Hello, world!")
        }
        .padding()
    }
}

struct ContentView_Previews: PreviewProvider {
    static var previews: some View {
        ContentView()
    }
}
What probably stands out is that there are two struct structures in one file. The preview in Xcode gets created from the ContentView_Previews structure at the bottom. If you have a view that takes arguments, or has a data source, you can populate it programmatically inside this preview structure. In this guide, we won't need to do anything like that.
Our focus will be on the ContentView struct. As you can see, it extends a SwiftUI View structure, and then declares a body.
The body contains a VStack struct, which is a vertical stack. The VStack can contain zero or more views, and will align them vertically, top to bottom. There is a corresponding HStack that we are not using that aligns views horizontally. If you nest vertical stacks within horizontal stacks, and vice versa, you can build out your user interface designs.
Inside the VStack you will see an Image view and a Text view. The Text view displays a piece of text supplied to it. You can add modifiers to a view to change its behavior. Some of these modifiers for text include the foreground and background colors and the font. Let's make an easy change and have the text "Hello World" show up in blue.
Add the modifier .foregroundColor(.blue) to the Text view:
Text("Hello, world!").foregroundColor(.blue)
The preview should automatically update to show the text as blue:

Using state in SwiftUI
SwiftUI is reactive, so we don't explicitly change the button's text like we might in UIKit. Instead, we can setup a state variable in our view that holds data we want to display. When we change the contents of that variable, the view will re-render the user interface with any changes that need to be shown.
We will create a button to change the text on the screen, but first we need to setup a state variable and then tell the Text view to display the contents of that variable.
Let's refactor our view a little. Start by creating a variable named myText. We declare a variable using the var keyword, but then we add the @State annotation to signify that SwiftUI will be managing this variable for us as a state property.
@State private var myText = "Hello, world!"
What are state properties? They're a way that we can make our user interfaces reactive. You can pass a state property in as the value for a view, and if your code sets a new value for that property, SwiftUI will automatically update the views.
Using this approach, we can avoid writing code that updates the user interface based on instance variables. Instead, we can express our user interface in terms of the state, and let SwiftUI manage it for us. This is very similar to the React framework for web development.
After adding the state variable, we need to adjust the Text to use the myText state property instead of the hard-coded string "Hello, world!".
struct ContentView: View {
    @State private var myText = "Hello, world!"

    var body: some View {
        VStack {
            Image(systemName: "globe")
                .imageScale(.large)
                .foregroundColor(.accentColor)
            Text(myText).foregroundColor(.blue)
        }
        .padding()
    }
}
You won't see any changes in how your screen looks in the preview, as we're just doing a little refactoring here.
Adding a button
Of course, we want our app to actually do something, so let's add a button to our project. With buttons, we can define an action to take when someone taps or clicks the button. This action could be inline, or a separate function. Our example here will use a separate function for clarity.
Let's start by adding a Button into our VStack after the Text view. We can define the label as well as an action to take. This won't compile until we define the function sayHi, so the preview will be broken for a bit.
Another thing we will do to give our button a bit of breathing room in our user interface is to use the padding modifier. Try taking it out, or adding it to the Text or Image elements to see how the view looks with and without it.
Button("Say hi!", action: sayHi).padding()
We'll also need to create a sayHi function to go along with our button.
func sayHi() {
    myText = "Hi!"
}
Using the func keyword, we declare a Swift function with no arguments, and then set the value of the myText state property.
Notice we don't need to get a reference to the Text view to make it change. If we were using UIKit, we would have to use an outlet or an id to change the label directly.
Combining those two changes with the ContentView view we've been working on, we should have code that looks like this:
struct ContentView: View {

    @State private var myText = "Hello, world!"

    func sayHi() {
        myText = "Hi!"
    }

    var body: some View {
        VStack {
            Image(systemName: "globe")
                .imageScale(.large)
                .foregroundColor(.accentColor)
            Text(myText).foregroundColor(.blue)
            Button("Say hi!", action: sayHi).padding()
        }
        .padding()
    }
}
After preview loads up, your screen should look similar to this:

Go ahead and click the button and you should see the text contents change.

This demonstrates the basics of using state variables with your SwiftUI views, along with how buttons work. There's certainly a lot more to cover with SwiftUI, but hopefully this is enough to get you started!