Creating your first iOS App with Swift and Storyboards
This guide is for beginning mobile app developers. You will need a Mac computer, running a recent version of Xcode. The version of Xcode used in this guide is 14.1 (November 2022).
At the end of this short tutorial, you will have built your first iOS app and run it on the iOS Simulator to see what it would look like on a phone.
UIKit vs SwiftUI
Apple supports two different ways of building the user interface for iOS applications, UIKit and SwiftUI. The UIKit framework is the original iOS user interface development technology. SwiftUI is a newer framework that is similar to the React Javascript framework for web. You can use them together, but for beginning programmers, it's best to start with one or the other.
This tutorial uses UIKit, but we also have a very similar tutorial that uses SwiftUI. When you are just starting out, my suggestion is to try both of them out, and see which one you prefer.
Install Xcode
If you don't have Xcode yet, download Xcode from the Mac App Store, and then open it up. It will offer to install additional components, which you will need to let it do. This can take a while.
You can also install a specific version of Xcode from the Apple Developer portal, if you need to go back to a previous version.
Open Xcode
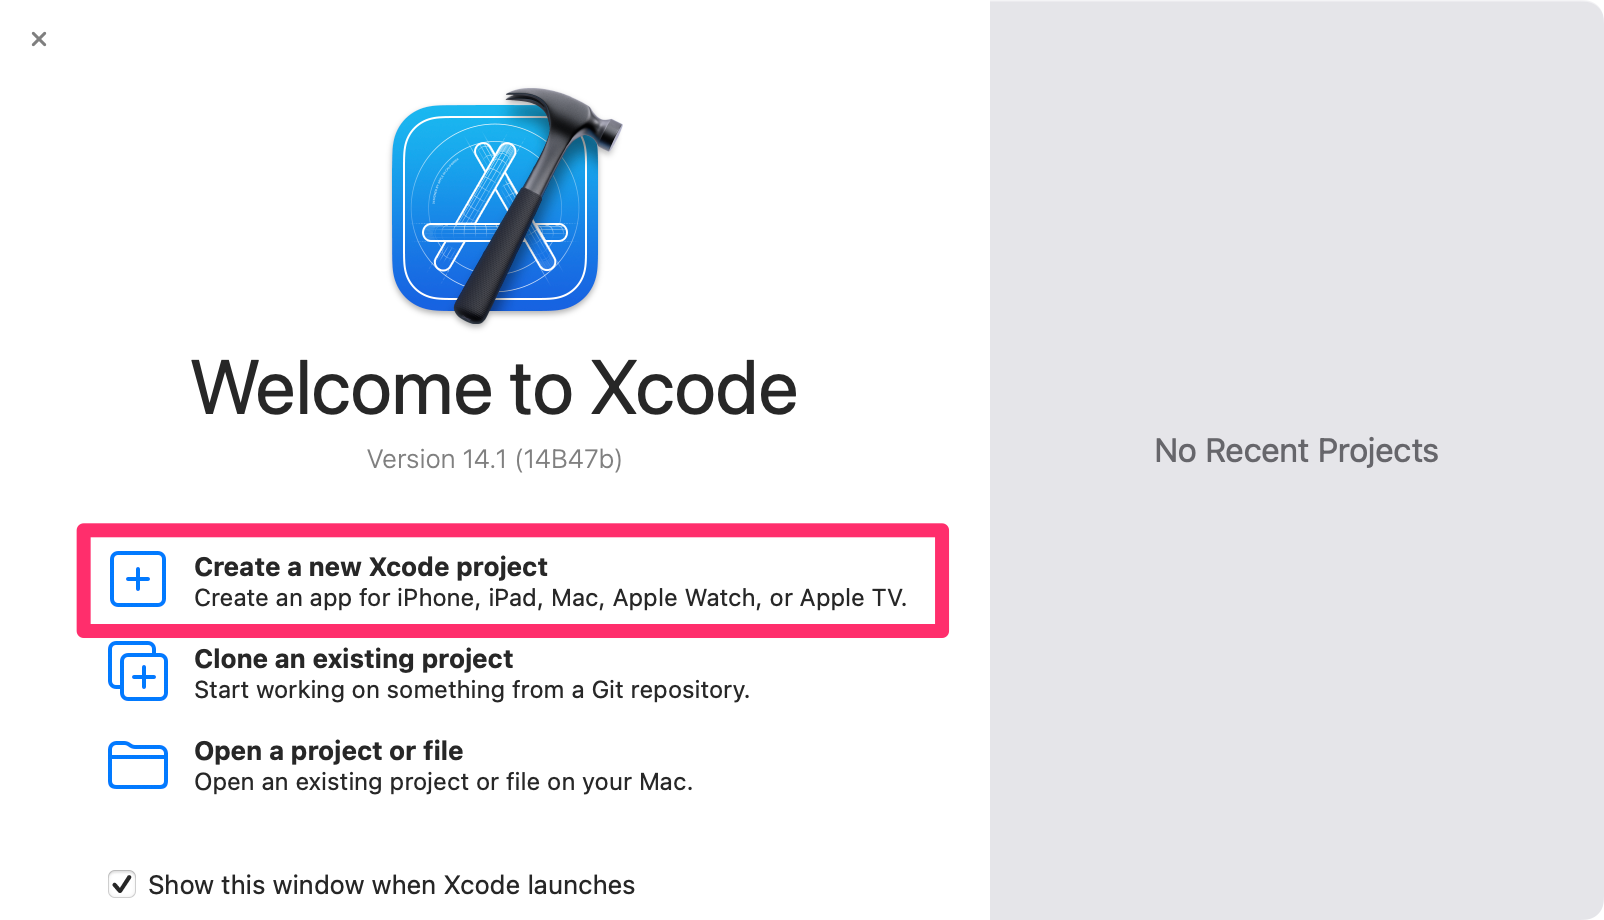
Once you have Xcode installed, start it up. You'll see a friendly Welcome to Xcode window appear.
We will be creating a new Xcode project, so choose the first option on the Welcome window.
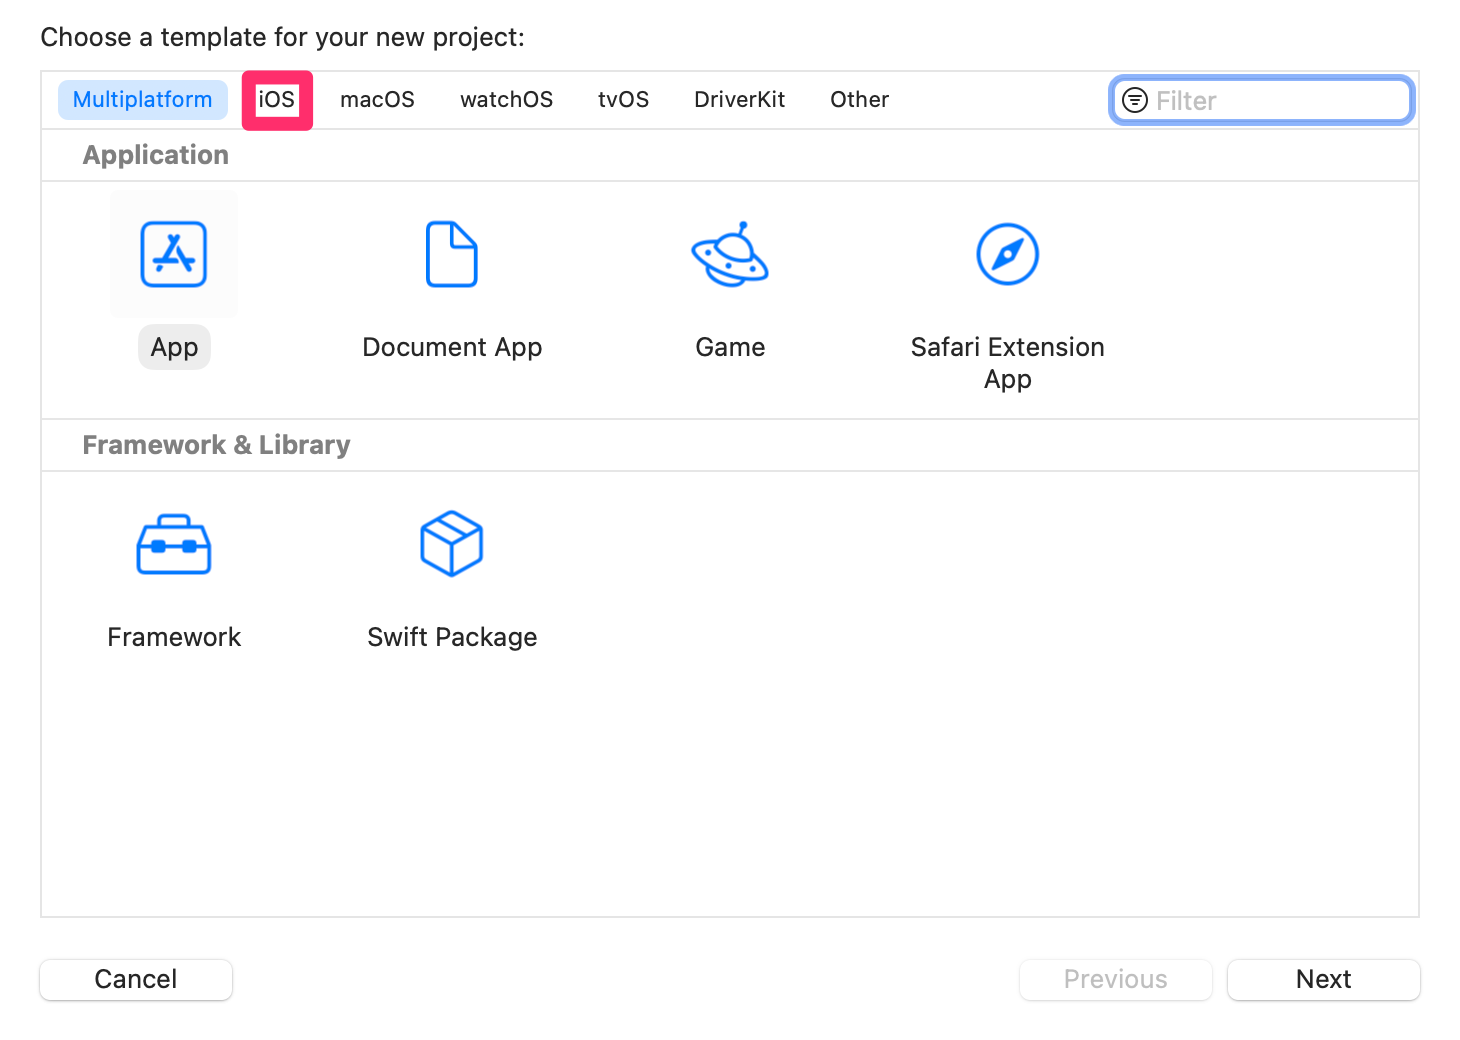
Next, a list of project template appears. Xcode will default to showing a Multiplatform app as the default, but we want to choose iOS in the small tab bar at the top of the window.
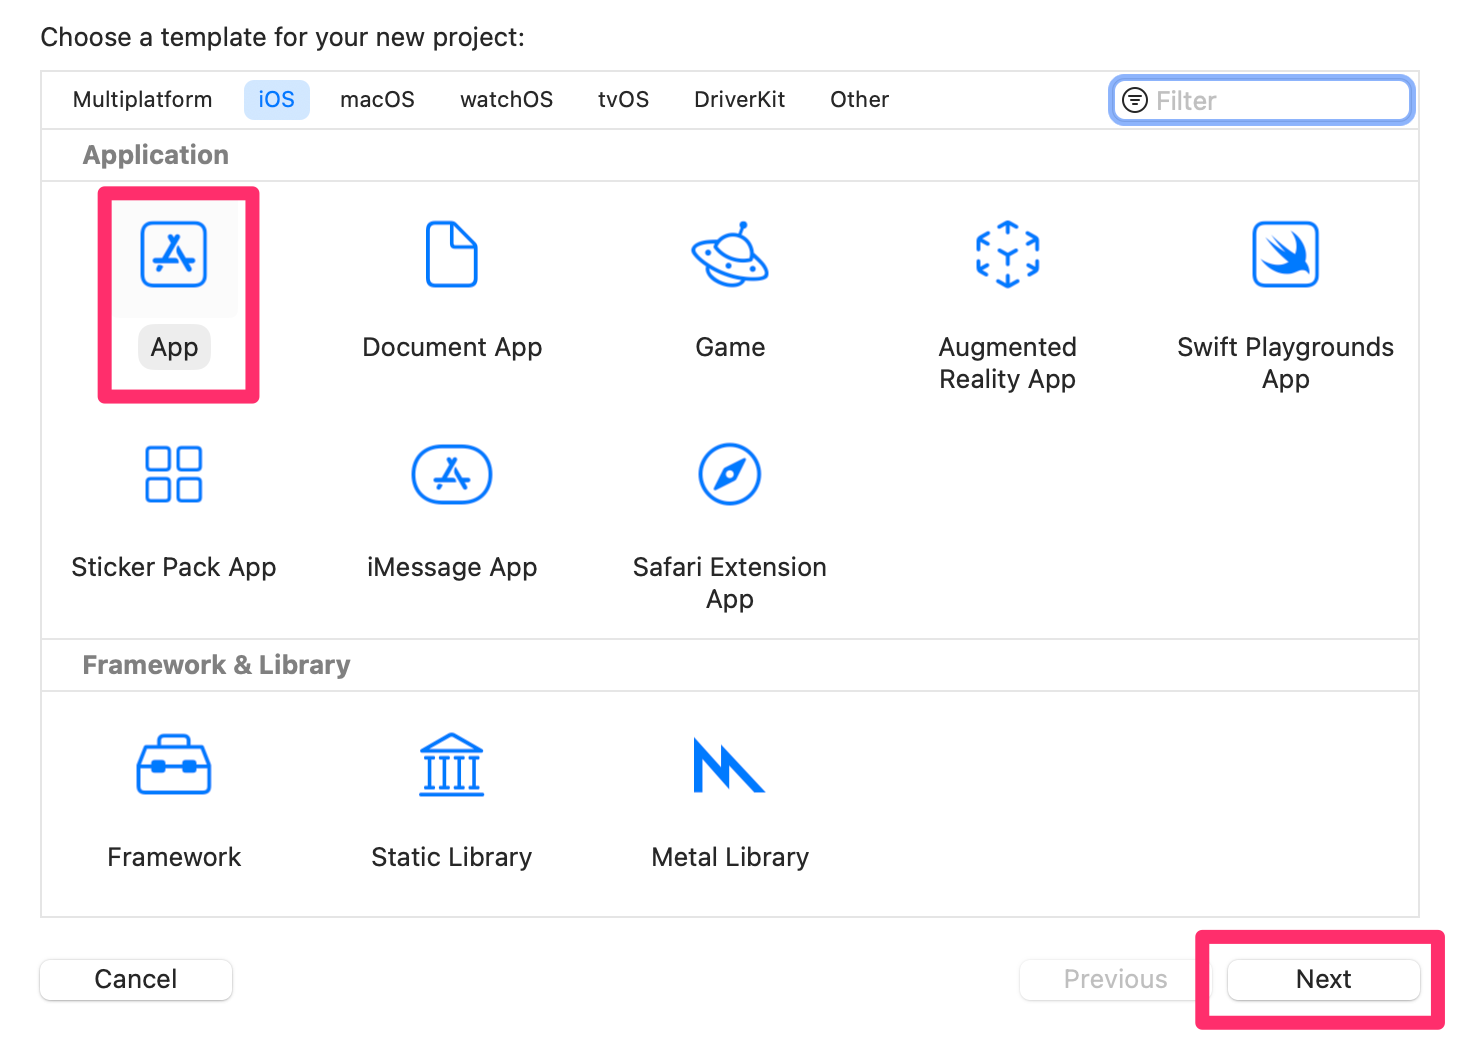
After choosing iOS, you will see a different list of templates - we are building an app, so click App and then click Next to move on in the process.
Xcode Project Options
After choosing one of the Xcode templates, you will need to fill in some details about your project. The three things you need to do are:
- Pick a project name
- Use an organization identifier
- Change the interface from
SwiftUItoStoryboard
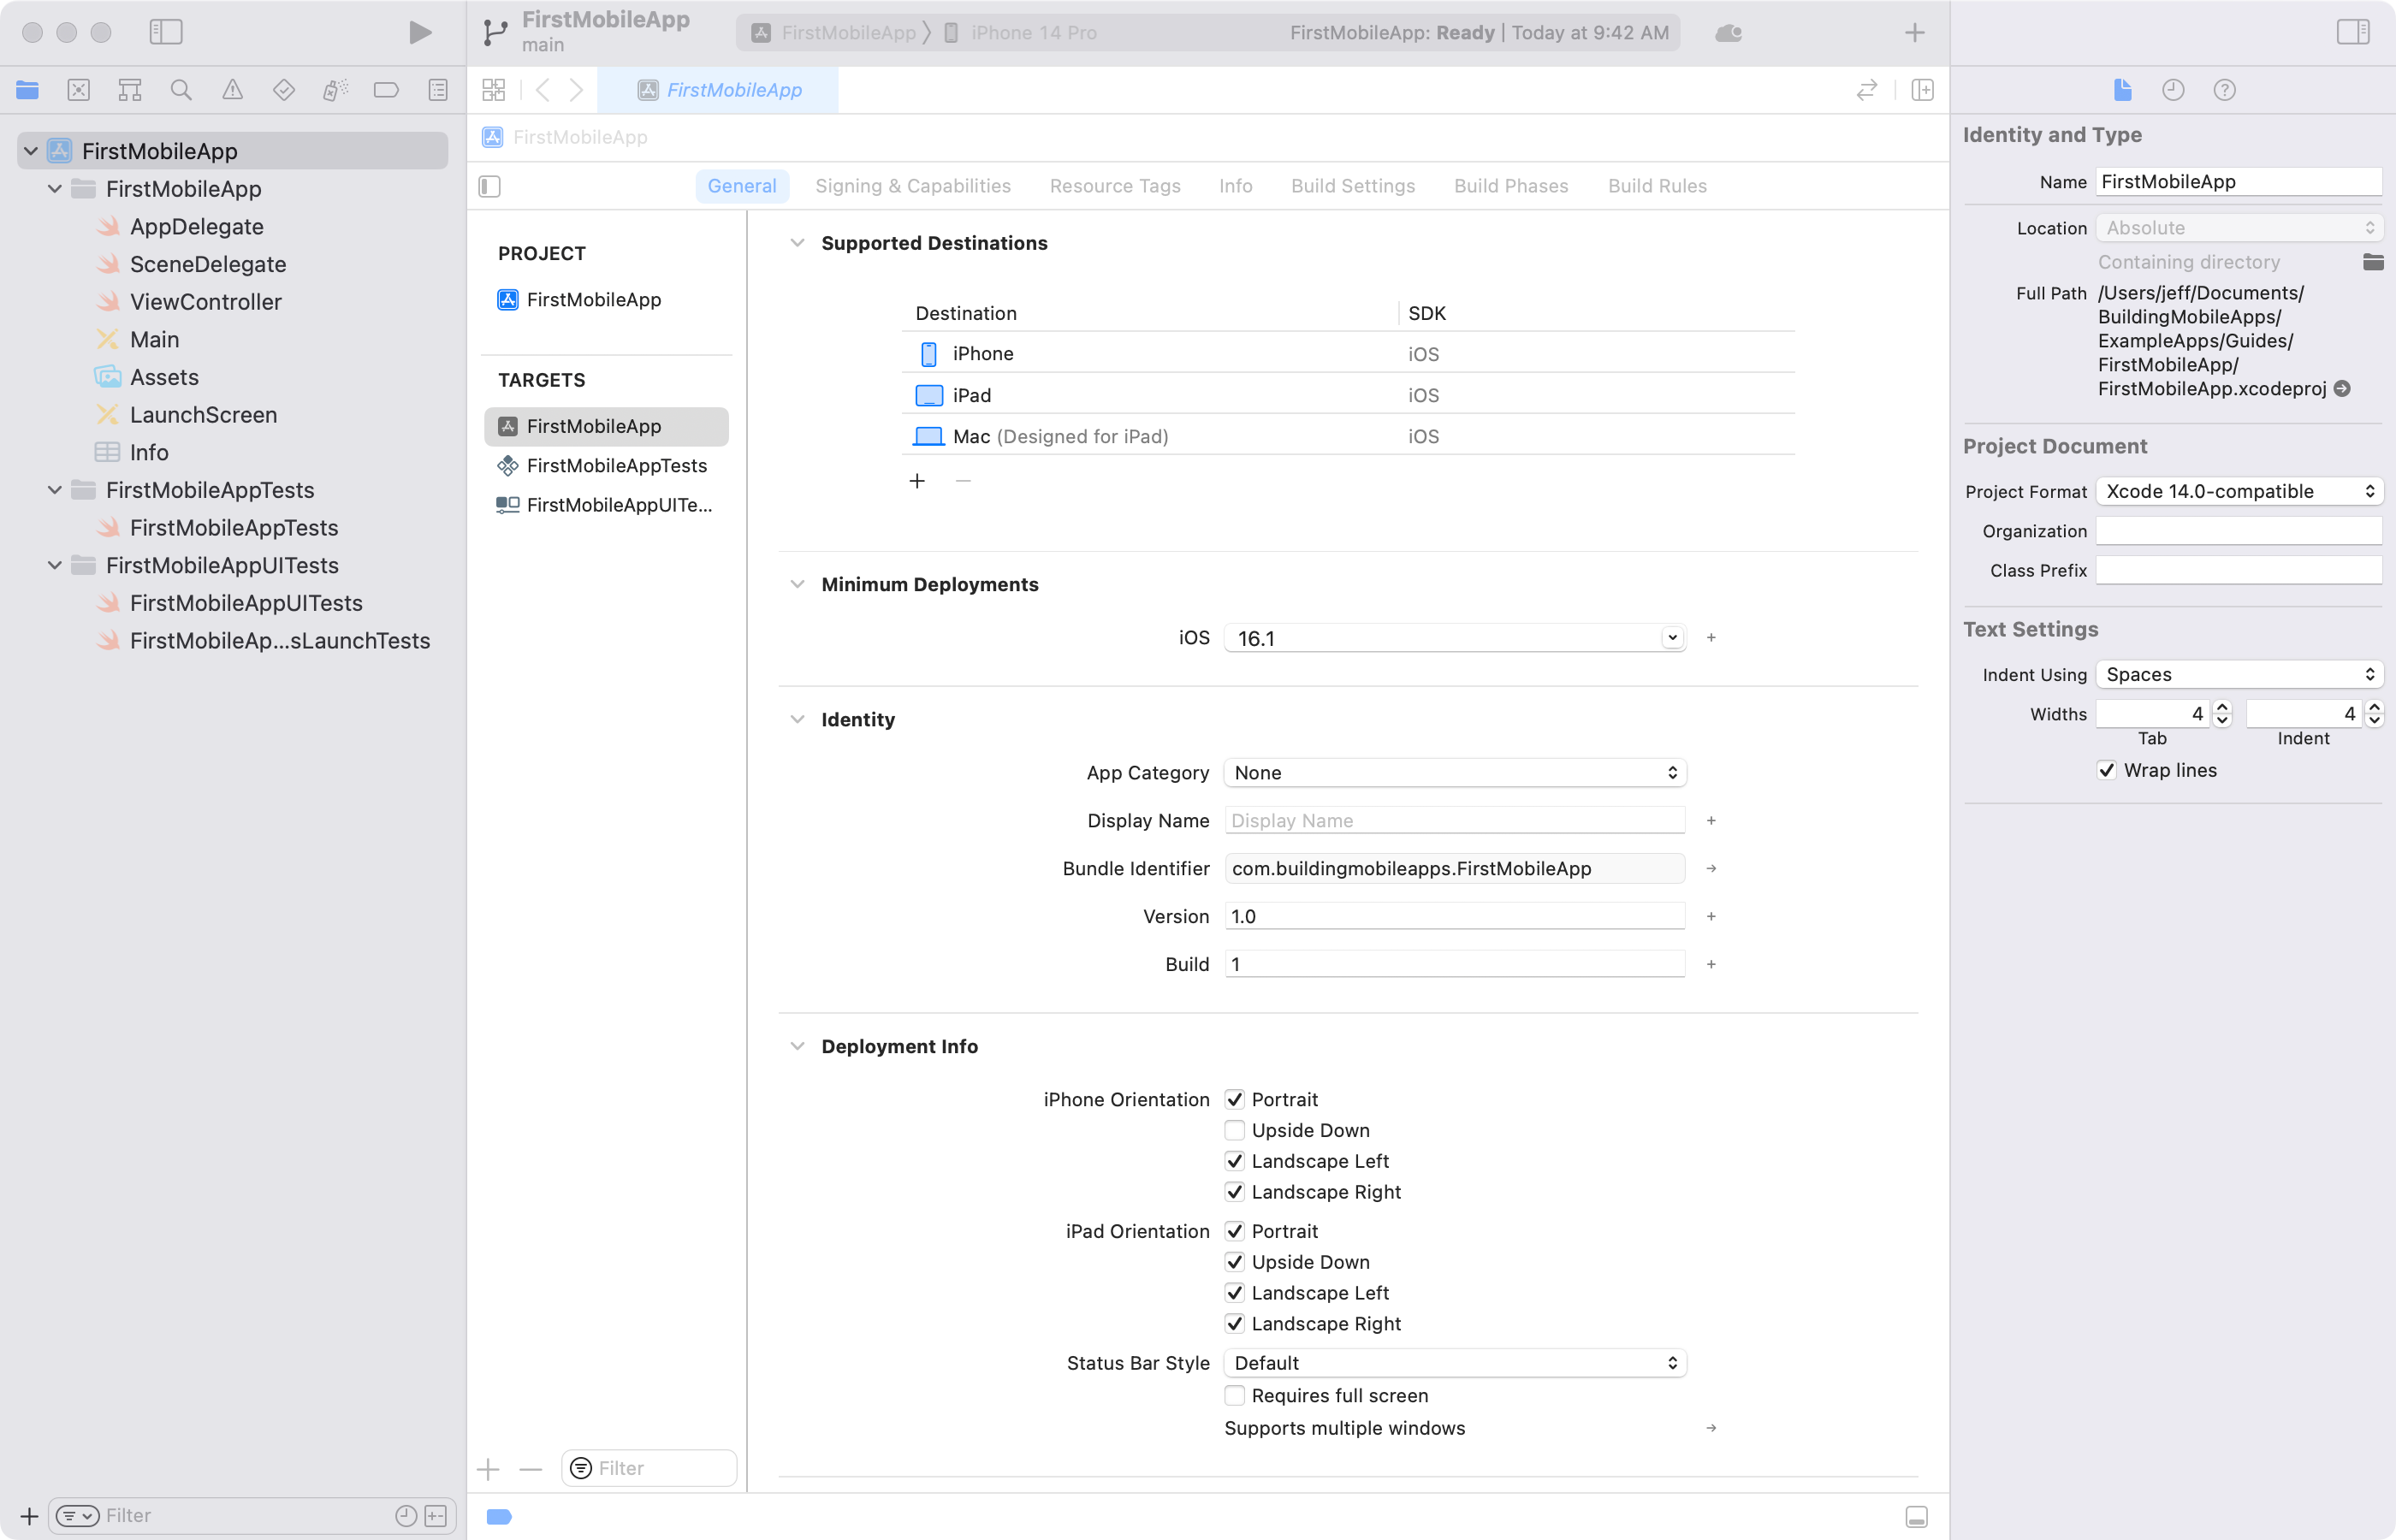
The project name can be FirstMobileApp or something similar. The organization identifier should be a domain name you control, in reverse order - such as com.buildingmobileapps or com.jefflinwood. If you don't have your own domain, you can make one up that is unique.
Xcode will default to using SwiftUI as the interface technology, instead of UIKit. Be sure to change the interface to Storyboard, as that is the term that Xcode uses here for the UIKit framework.

Fill in the project name and organization identifier, choose Storyboard as the Interface, and then click Next.
Xcode will offer to save your project on your Desktop - you can put it wherever you like. The checkbox for creating a Git repository on your Mac will be checked. We won't be using Git in this guide, but we recommend that you leave this checked by default.
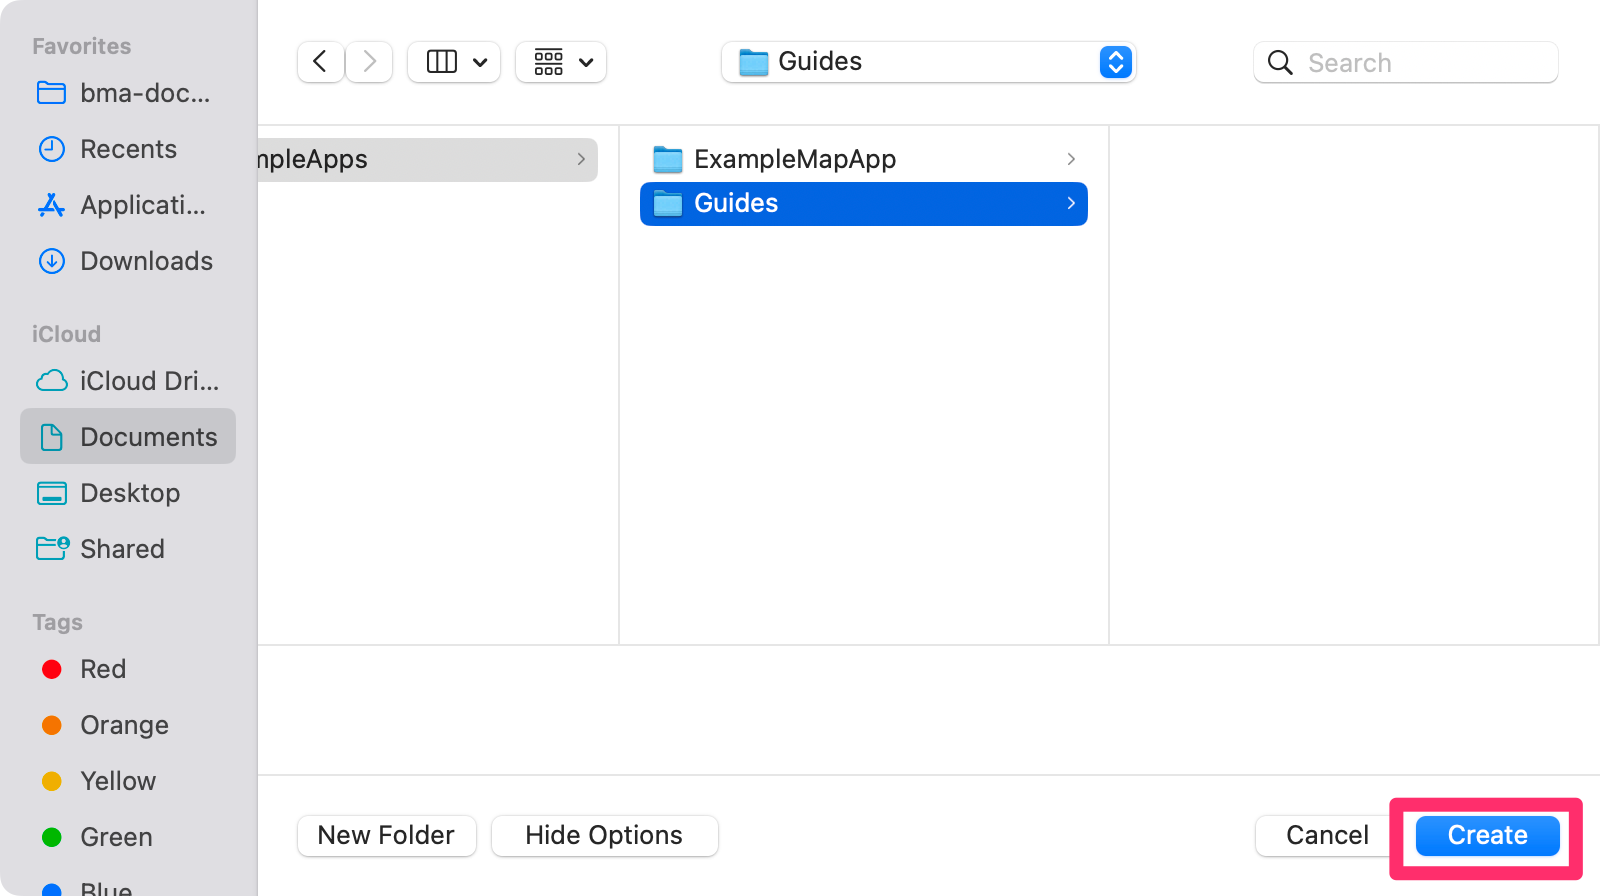
Save the project by clicking Create, and then Xcode will open your new project.
Your first Xcode project
Once Xcode opens up the project you just created, it can be a little intimidating. A lot of files got created for you, which is nice, but it's also not obvious where to start to make changes.
The only files we are going to change in this guide are:
ViewController- the Swift code for the only screen in our iOS appMain- the Storyboard file where we visually design the screen
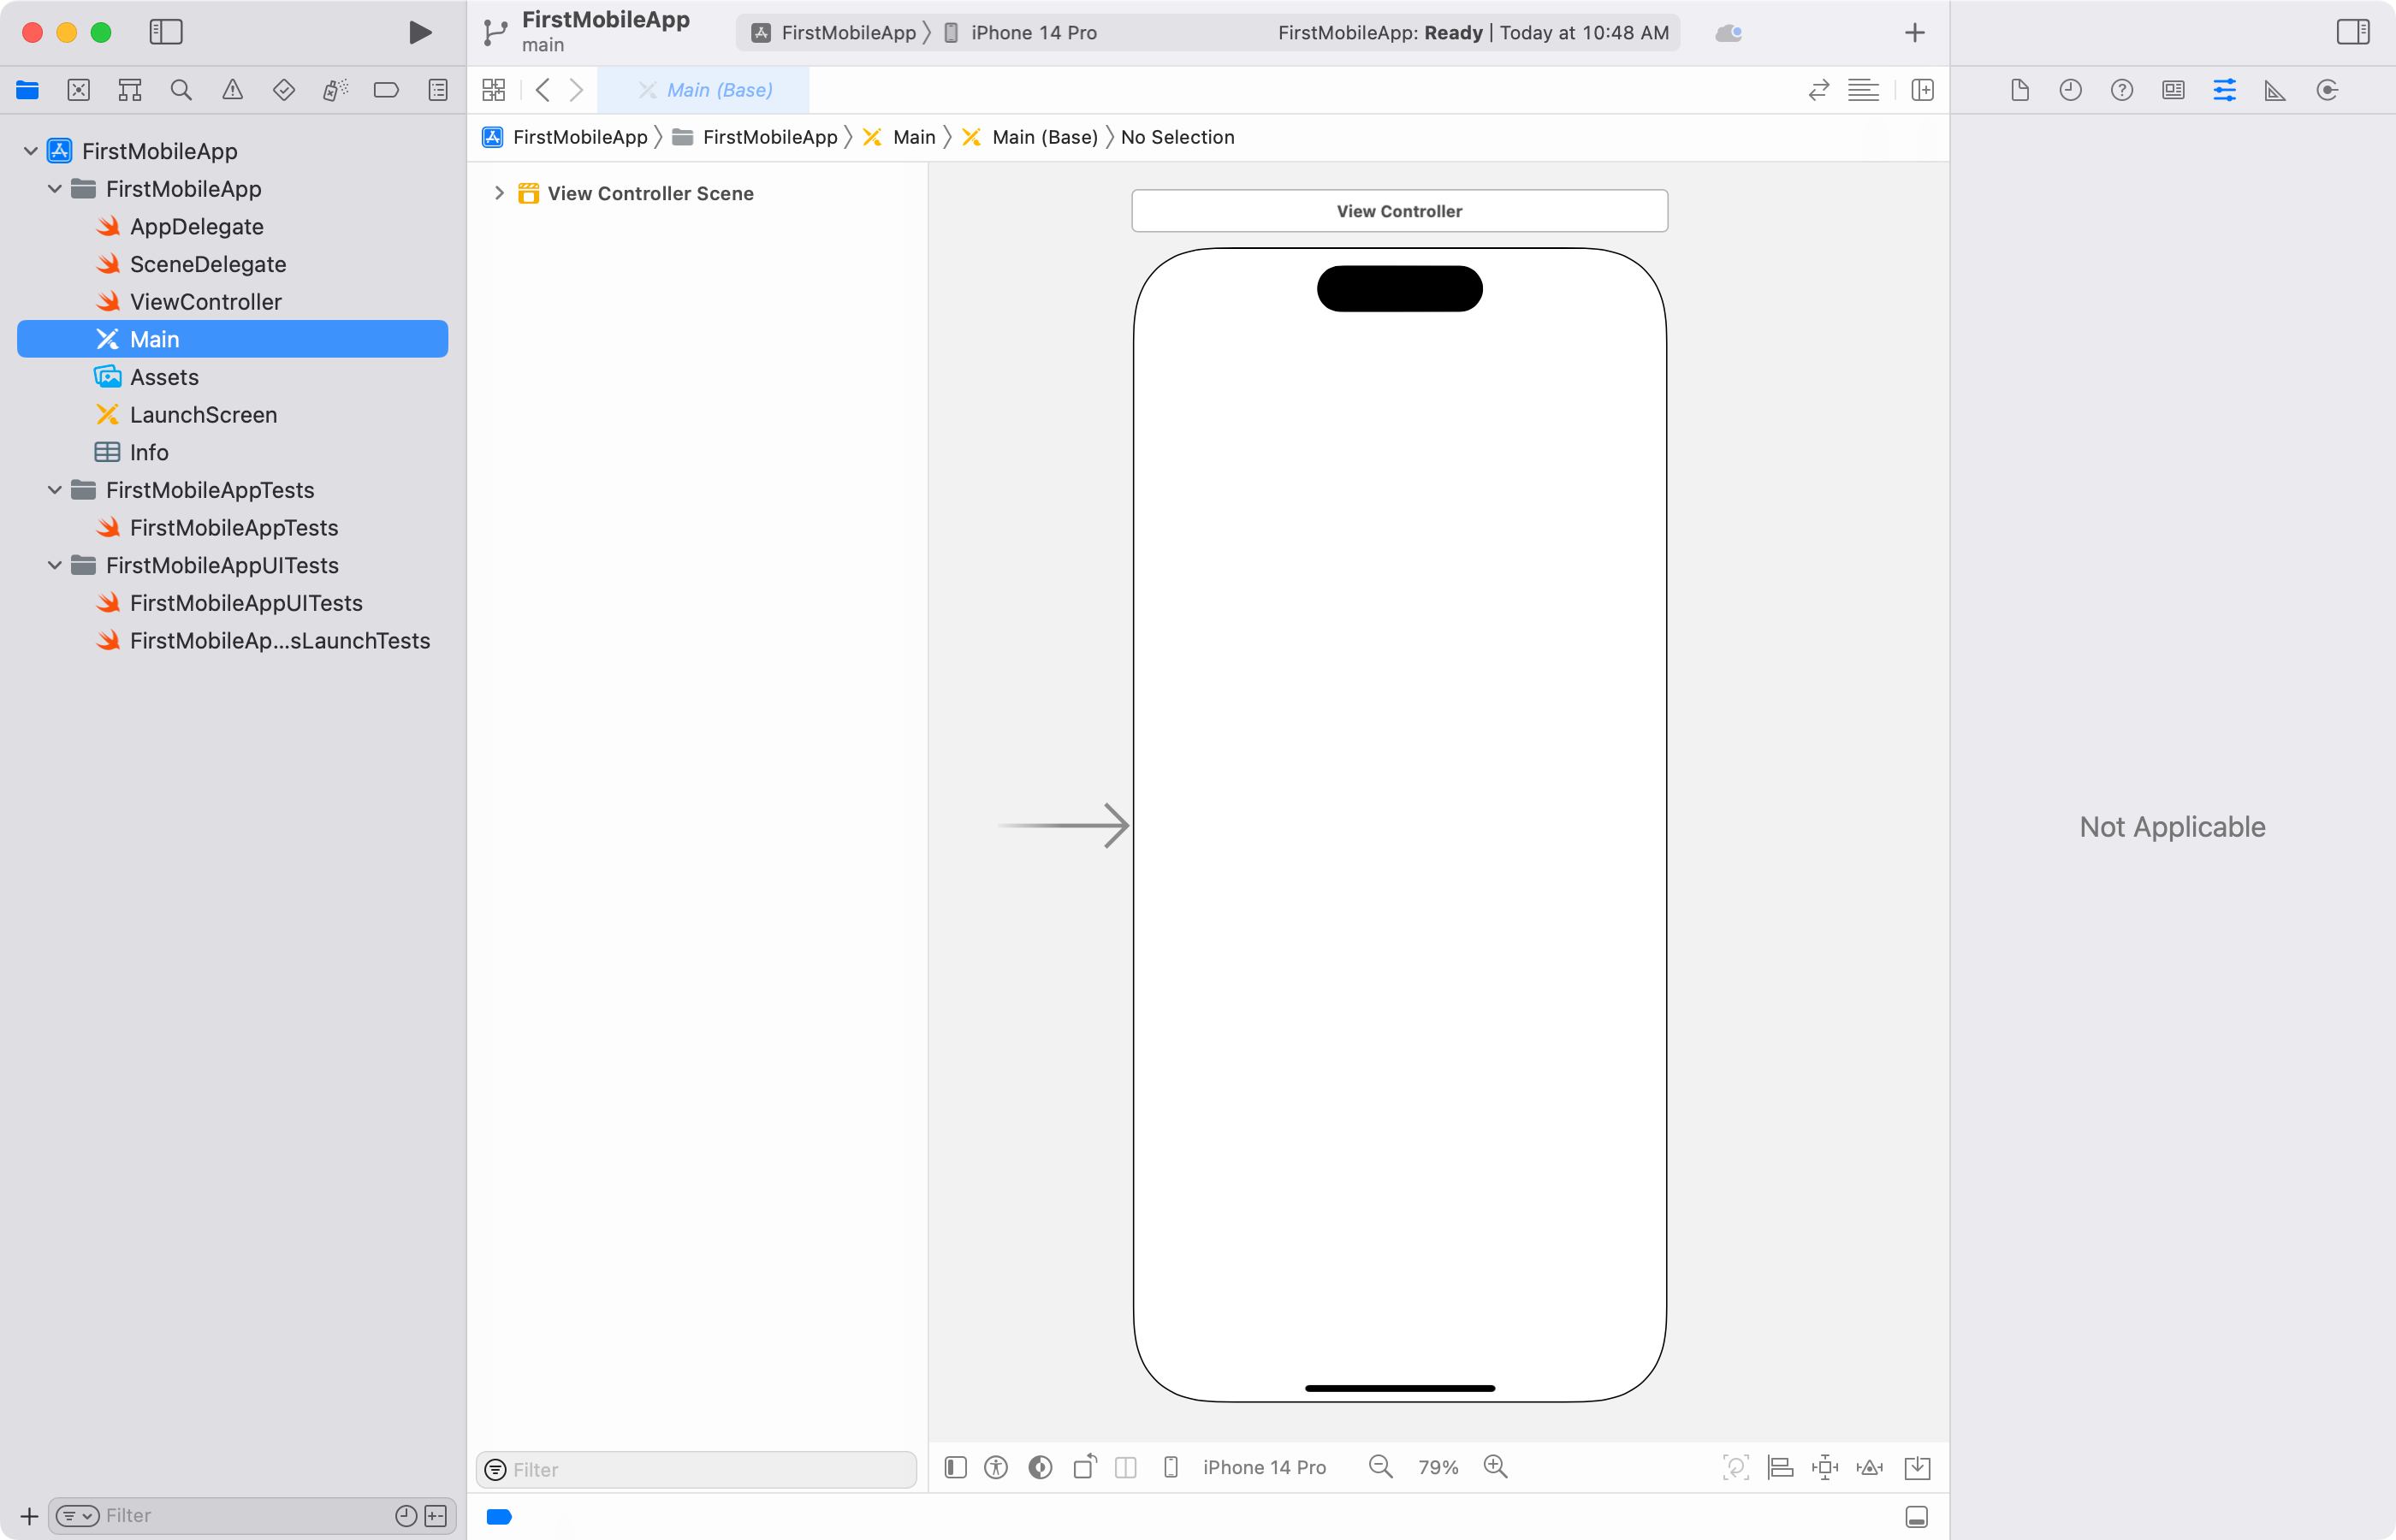
Select the Main file on the right hand side - that is the Storyboard, and where we will start building our iOS app.
Working with Storyboards
In Xcode, a storyboard file is the place for you to design one or more screens of your iOS app. You do not have to use storyboards, but when you are just getting started, they are a lot easier to visualize than programmatic user interfaces with UIKit.
When you created your iOS project, Xcode generated a Main.storyboard file with one screen in it. This screen is blank - it is up to you as a designer or developer to add things to the screen to make it interesting.
One note - the arrow coming in from the left on this screen means that this is the initial screen in the storyboard. Because your app only has one storyboard, that also means that this is the first screen a user will see after the app finishes launching. It's quite possible to have multiple storyboards in an app, but that's a little outside the scope of this guide.
Adding a Label to the Storyboard
Having a blank screen in your app isn't very much fun - we want to start adding text, buttons, colors, photos, lists - all the things that make up a great iOS app!
Let's get started by adding a label to our screen. A label is a user interface object that can display a piece of text. The text itself (like "Hello") is a String object, but the label is from a separate class named UILabel. The string the label displays is only one of the properties you can set on the label to make it do different things.
Use the + button in the top bar of Xcode to add something to the storyboard. Xcode does not necessarily have the most obvious user interface itself, and this is one of those examples. In the following screenshot, the + button has been highlighted.
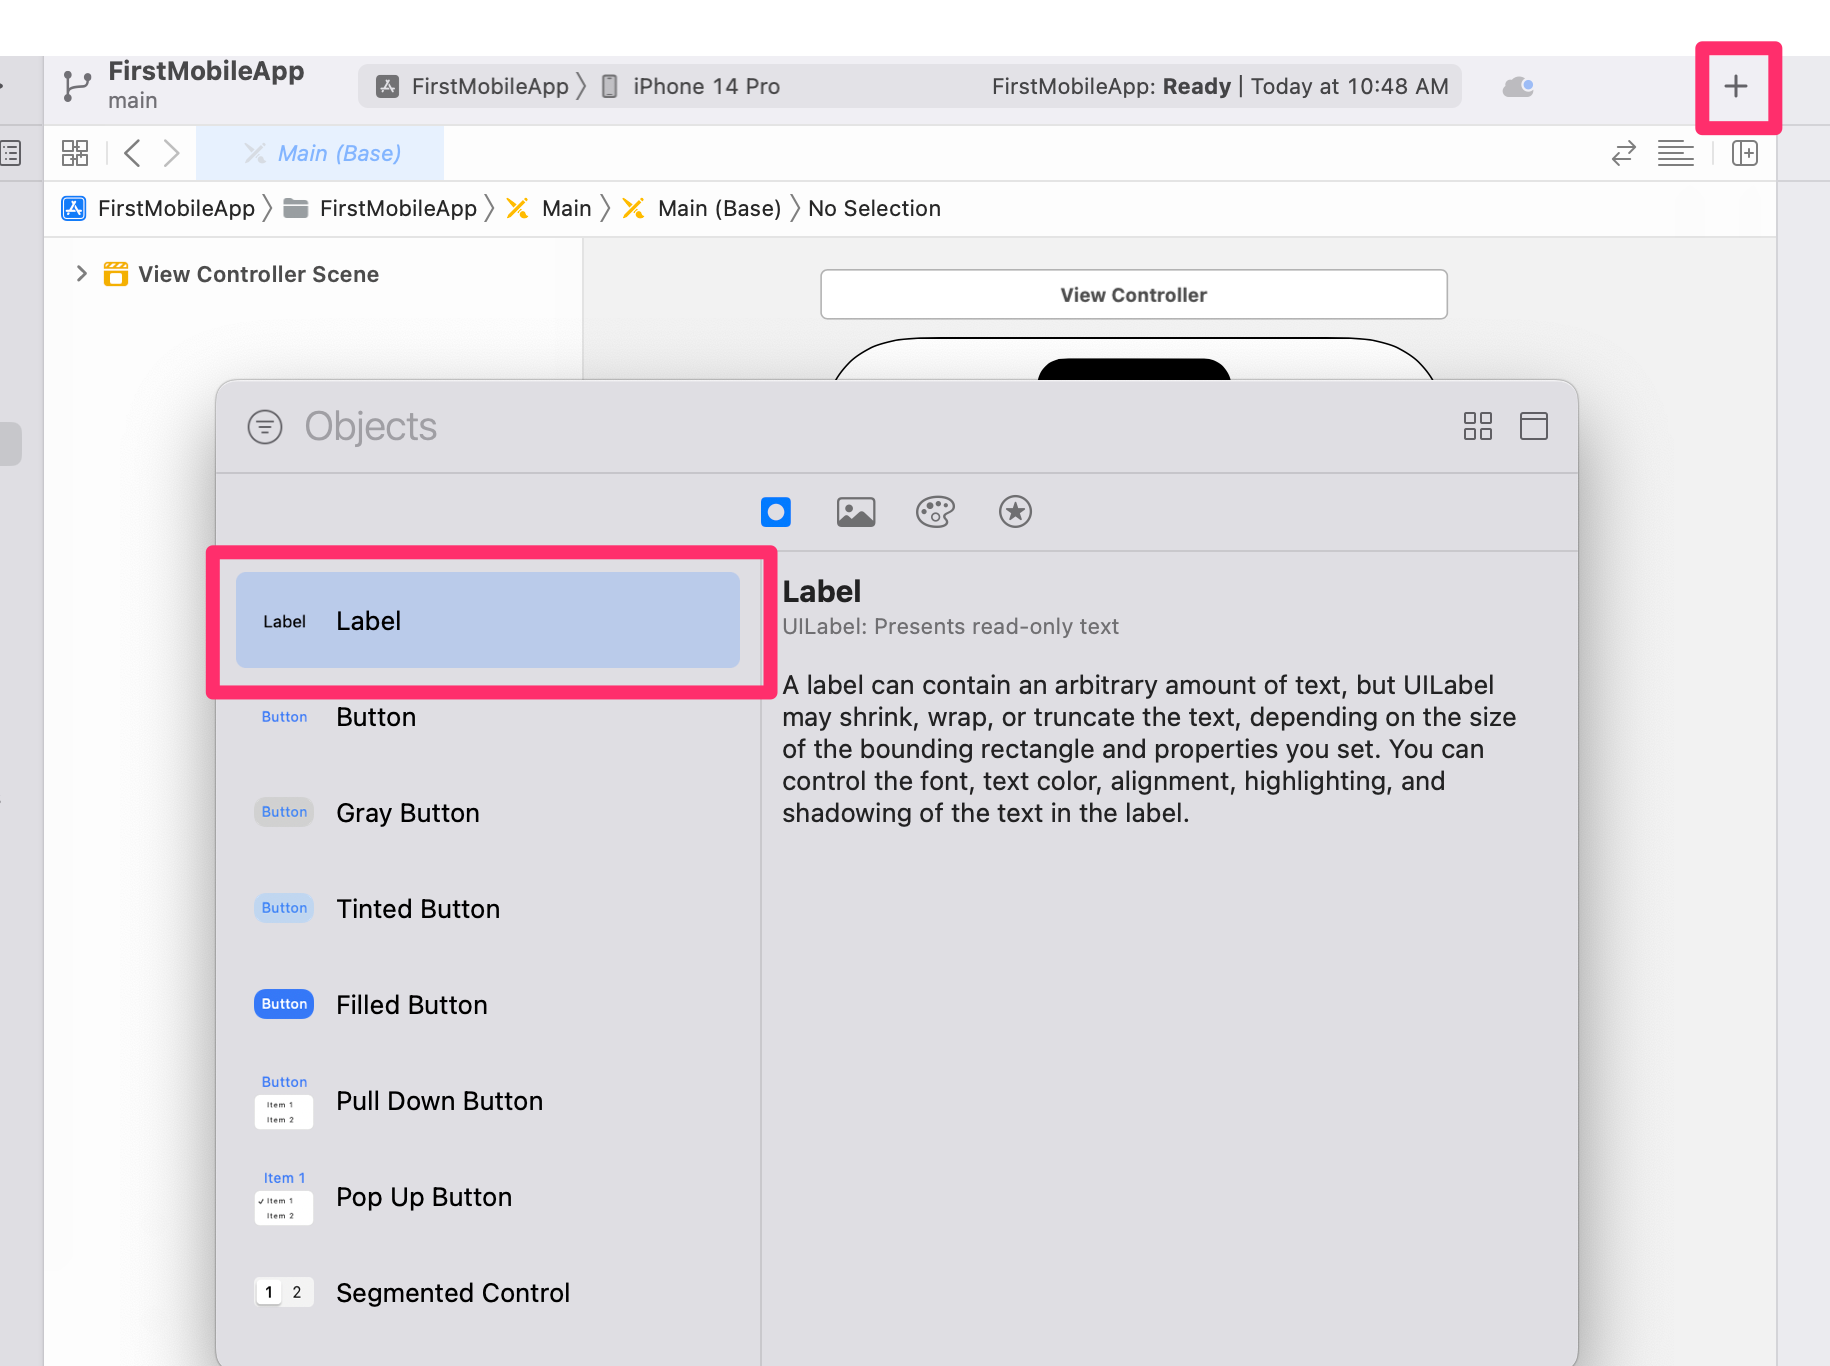
After pressing the + button, a small window will pop up with various things that you can drag onto your app's screen in the Storyboard. The very first choice is the label. Click and drag the label onto your screen - if you can get it centered horizontally and vertically, like the following screenshot that's great, but if you can't, that's ok too.
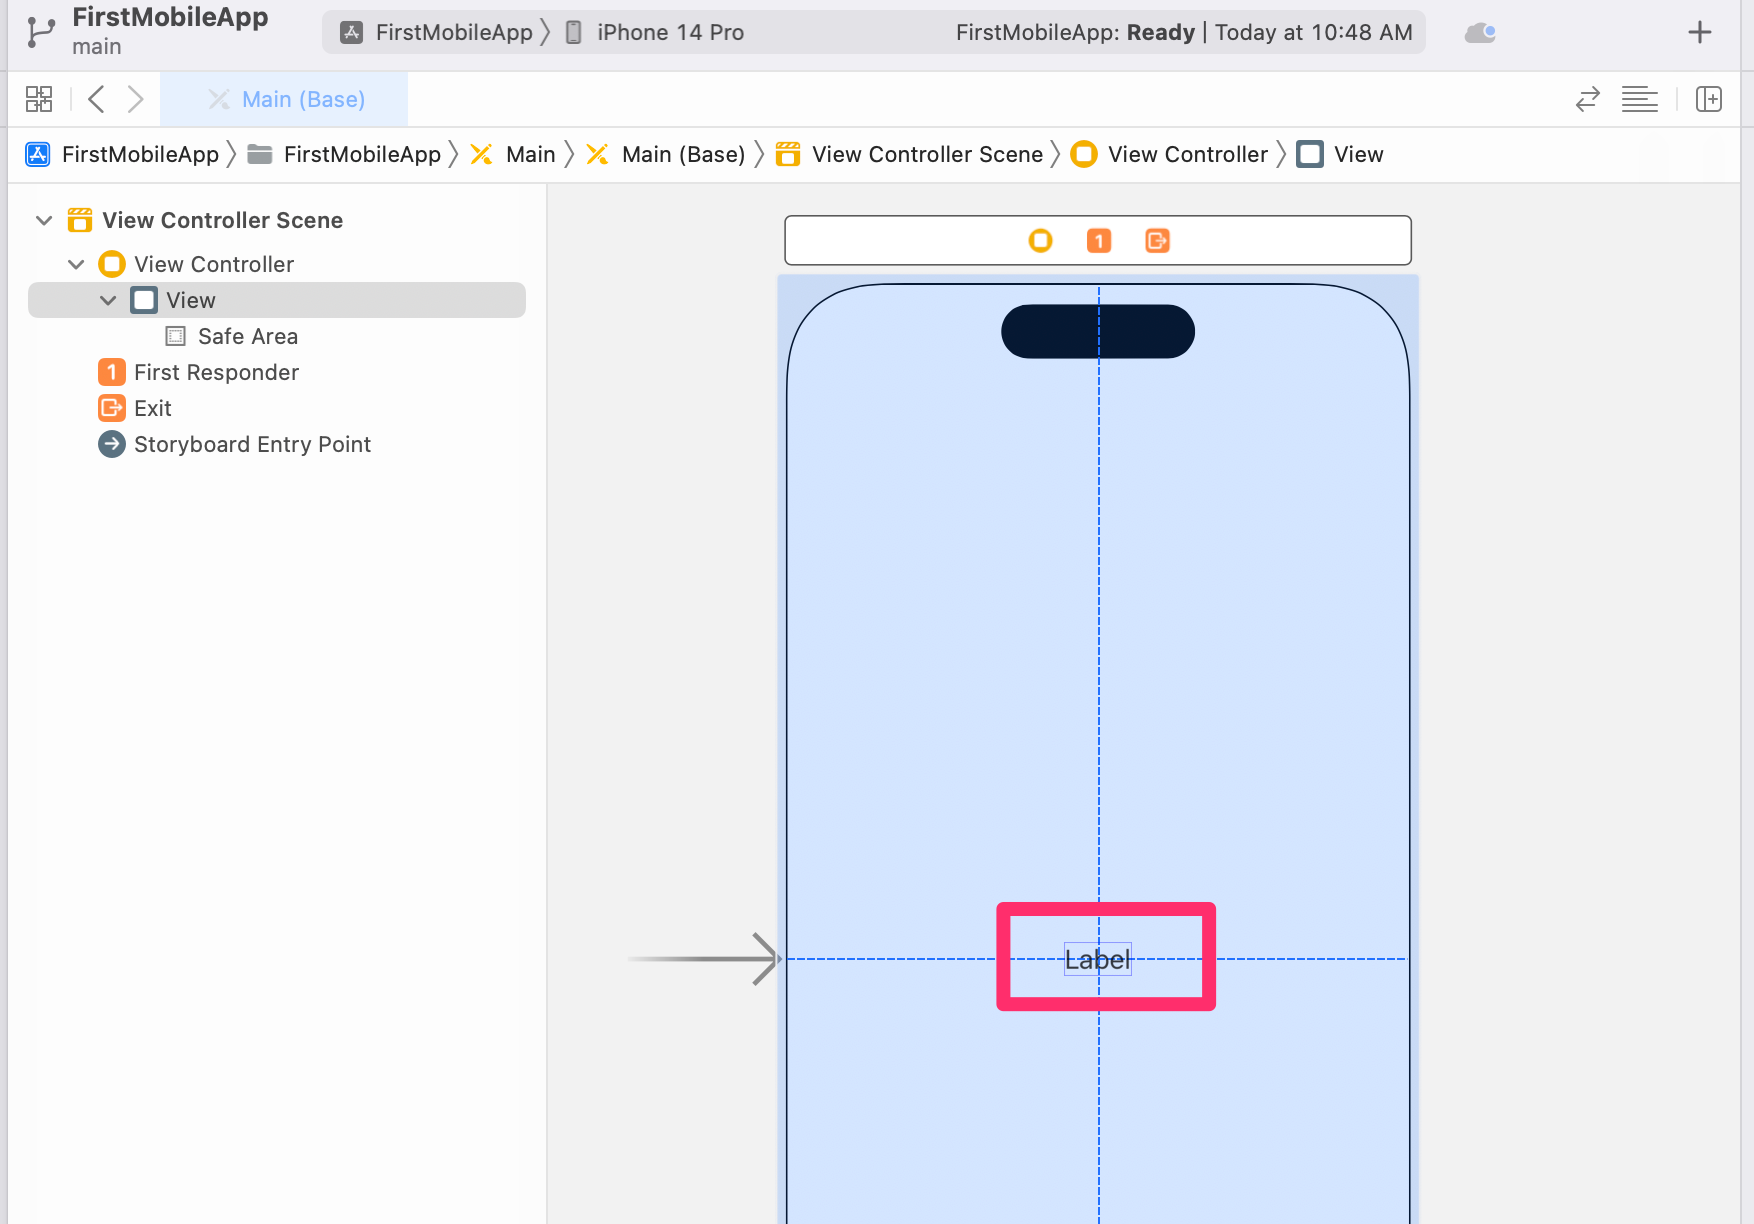
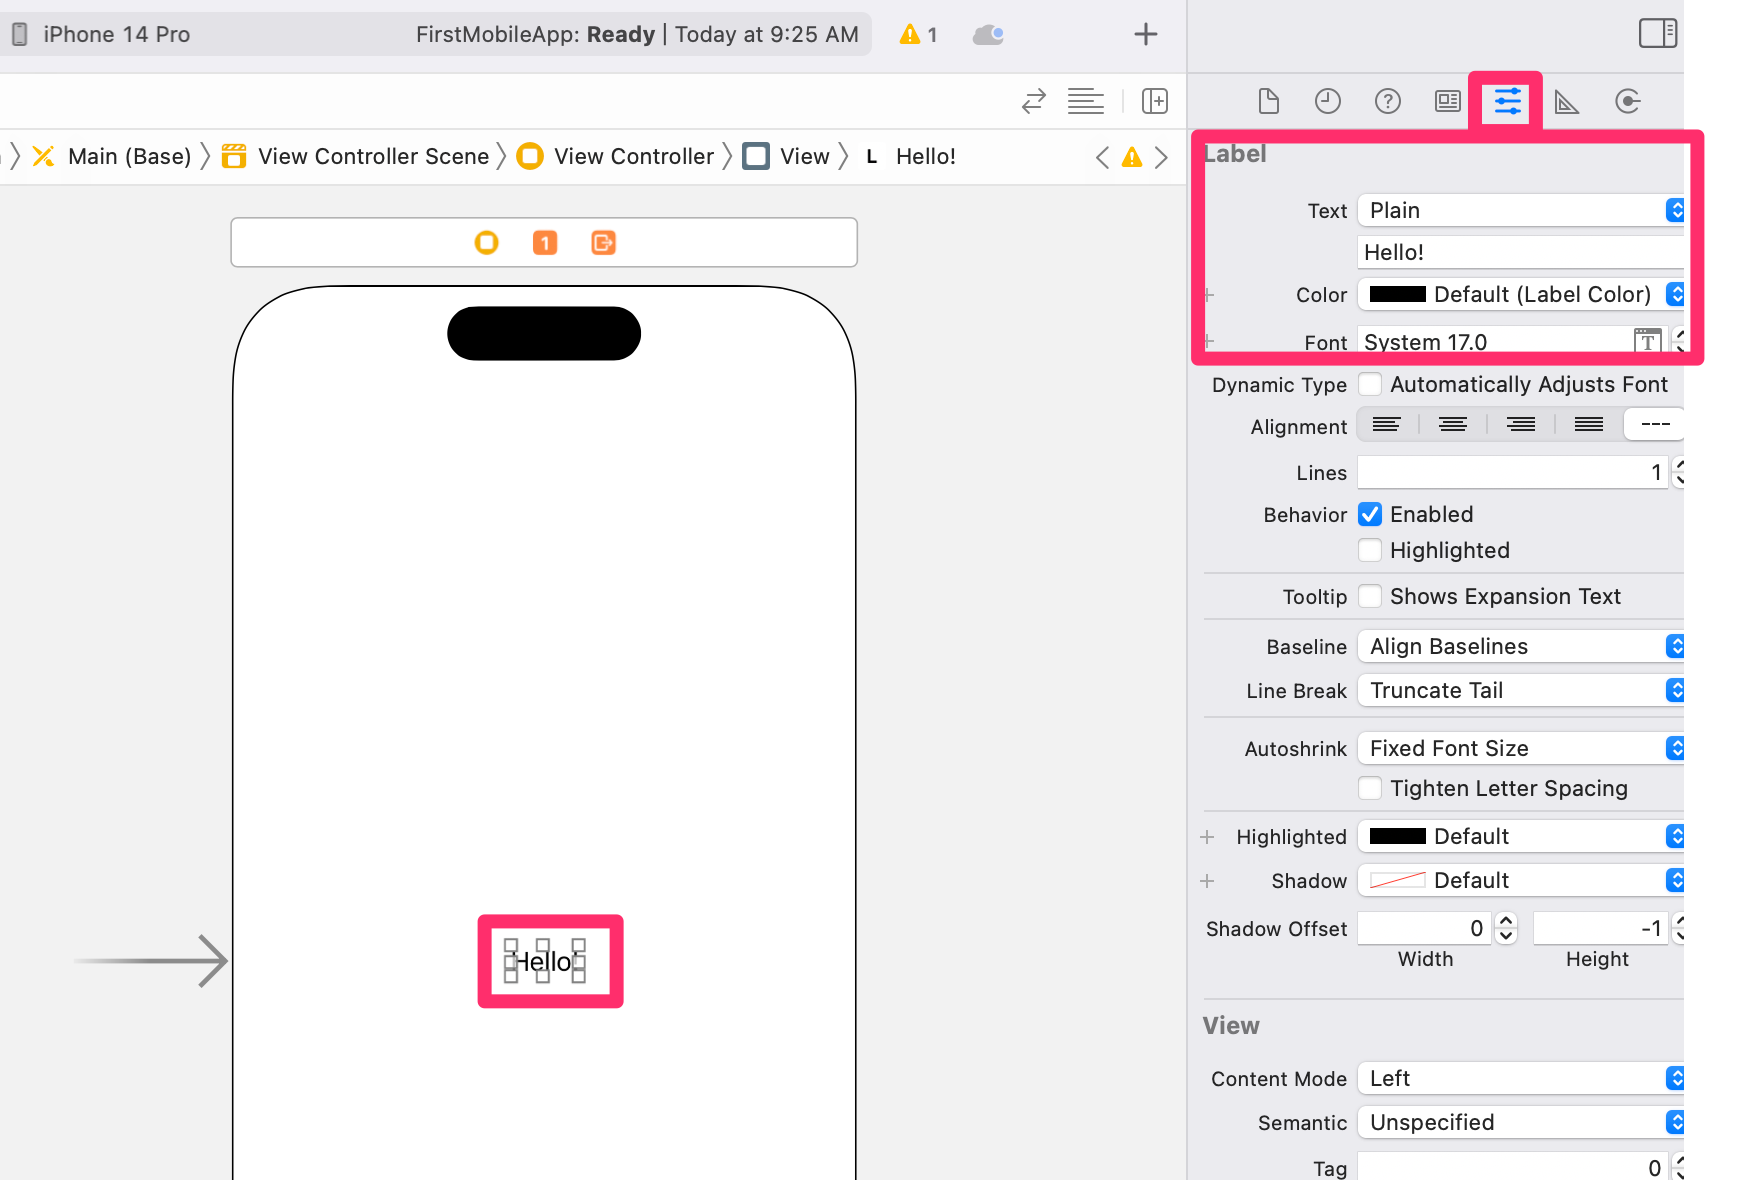
Release the mouse button, and the label will be part of your screen. Click to select the label if it isn't already selected, and a set of attributes will appear in the Attributes Inspector on the right hand side of the Xcode screen. The Attributes Inspector is one of 7 tabs, so I highlighted it in the below screenshot.
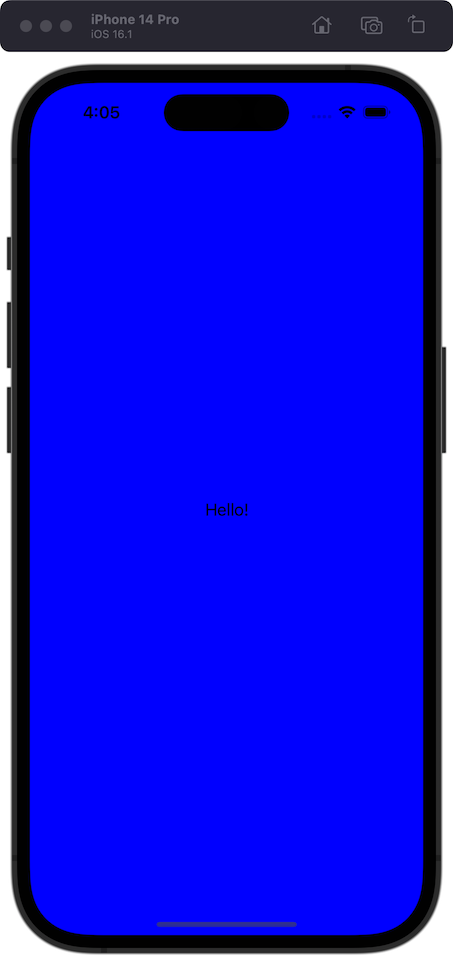
Change the text to Hello! in the input box at the top. You will see the change reflected in the Storyboard once you click away from the input box.
Now that we've made one simple change to our application, let's try running it in the iOS Simulator, so we can see what it would like if we ran it on a phone.
Running in the iOS Simulator
Xcode comes with an iOS Simulator application that can mimic running your iOS application on various iPhone or iPad models and iOS or iPadOS versions. This isn't a substitute for testing your application on an actual device, but it can be very useful for developing and testing as you go.
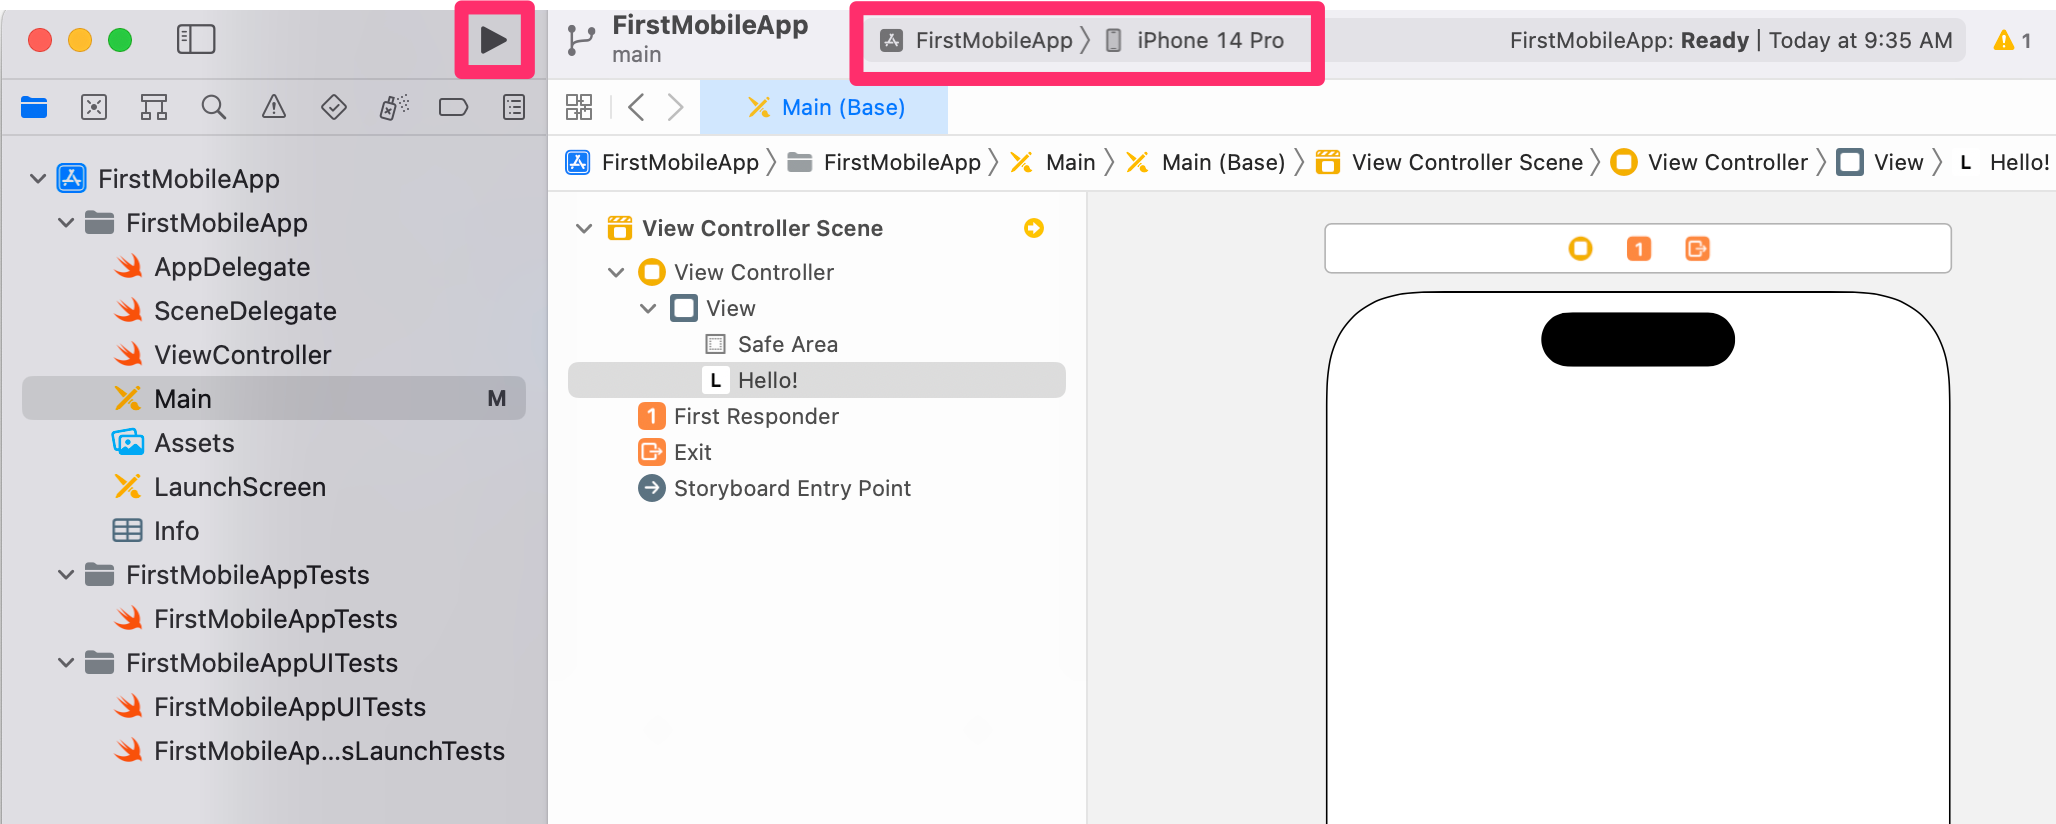
The run on iOS Simulator (or an actual iPhone or iPad) button is at the top of the left hand column in Xcode - it is a triangle pointed to the right.
Make sure you have an iPhone model selected in the dropdown that says iPhone 14 Pro in this screenshot - it doesn't really matter which one, but it shouldn't be "My Mac" or "Any iOS Device".
A new application will run on your Mac that looks like an iPhone.
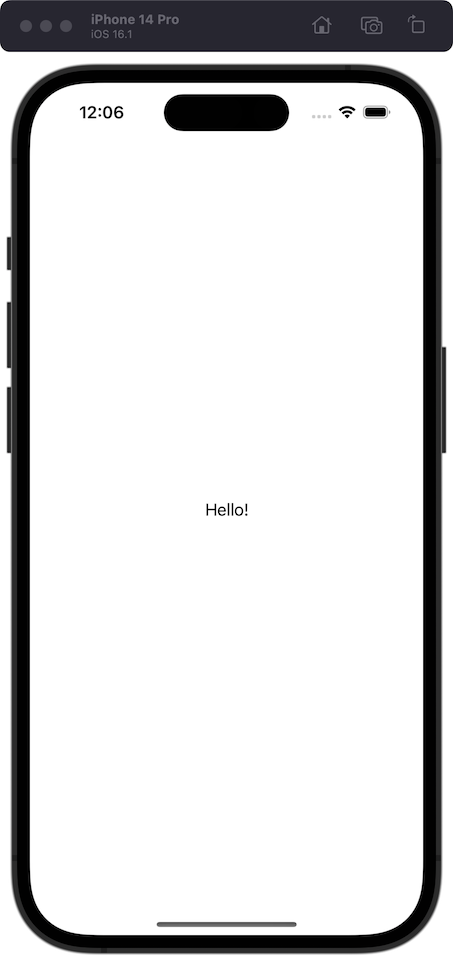
You can leave the Simulator running while you work on your iOS application in Xcode - you can even have multiple Simulators running at the same time, if your Mac is powerful enough.
Writing some Swift code
So far, we have not written any code to do anything in our iOS app, but to do anything interesting, we need to. The programming language we will use is Swift, which is nice to learn, but really only useful for programming native iOS and MacOS apps.
When we created the project, one of the files that got created was ViewController.swift. Open up this file and take a look at the code inside.
import UIKit

class ViewController: UIViewController {

    override func viewDidLoad() {
        super.viewDidLoad()
        // Do any additional setup after loading the view.
    }

}
The first line of code here brings in the UIKit framework that your app uses to work with the Apple user interface objects that display on the screen. There are lots of frameworks built into iOS that you can include, and there are many open source or commercial libraries you can also add to your project.
On the next line of code, we declare a class named ViewController that extends the functionality of a class named UIViewController. The UIViewController class is Apple's standard class for working with one screen in an iOS app. It comes from the UIKit framework that we imported on the first line. Anything our screen does that is special needs to be added to the ViewController class - otherwise we can use the default behavior from UIViewController.
Inside the ViewController class, we have a function named viewDidLoad that does not take any arguments, and then calls the viewDidLoad method on the superclass (UIViewController). A helpful comment says that this is the place to do any setup after loading the view.
After that comment, but within the braces that contain the viewDidLoad function, add a new line of code:
    override func viewDidLoad() {
        super.viewDidLoad()
        // Do any additional setup after loading the view.
        view.backgroundColor = .blue
    }
We are changing the background color of the view controller's view (the screen the app is displaying) to a new color - blue.
The .blue on the right hand side of the equals sign is a shortcut for UIColor.blue. Several common colors, such as blue or red, can be used like this, or you can pick any color you like using a Color Literal - we'll discuss these in a separate guide.
Te view controller will load all of the things in the storyboard up and create them as the view and a set of child views (known as subviews). After these are all loaded, the view controller will call its own viewDidLoad method, which will then run. So anything you do in the viewDidLoad method can change the behavior of the view objects in the storyboard.
All view objects have a backgroundColor property that can be read or changed. Here, we're changing the main view's background color.
Go ahead and run the application again - you will get a dialog box similar to the following screenshot.
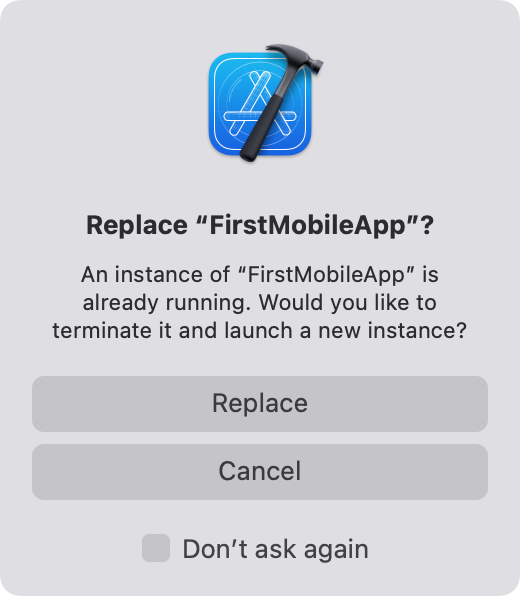
You should check the "Don't ask again" box, so that running your code again will simply replace the currently running application. Otherwise, you'll need to stop, then start your application every time.
Go ahead and click replace on that dialog box, and now your new, very blue, app will be running in the iOS Simulator.
Now, let's connect that label we created with our Swift code, so that we can change the message in it!
Creating an outlet in Storyboard
We'll be using outlets and actions to make connections between code and storyboard.
Think of outlets like nouns - the labels, buttons, images, or other things you might see on the screen.
Actions are the verbs - they describe what happens if someone taps on a button, or if someone changes the text in an input field using the keyboard.
There are several different ways to make connections between objects on the storyboard and the code in your view controller class. The approach I'm going to show you here is fairly flexible and will help you avoid some common mistakes.
Add the following line to your ViewController class, right above the viewDidLoad declaration:
@IBOutlet var helloLabel: UILabel!
Here, we are declaring an outlet variable named helloLabel, and the type of the variable is an implicitly unwrapped UILabel optional.
Optionals in Swift are a different concept than you might be used to in other programming languages - an optional can either hold a value or be nil (null in other languages). Swift makes you as a developer decide how you will handle nil for things that might not have a value, rather than either ignoring it or throwing an error. The @IBOutlet annotation marks this property as one that can be connected in the storyboard.
import UIKit

class ViewController: UIViewController {
    @IBOutlet var helloLabel: UILabel!

    override func viewDidLoad() {
        super.viewDidLoad()
        // Do any additional setup after loading the view.
        view.backgroundColor = .blue
    }
}
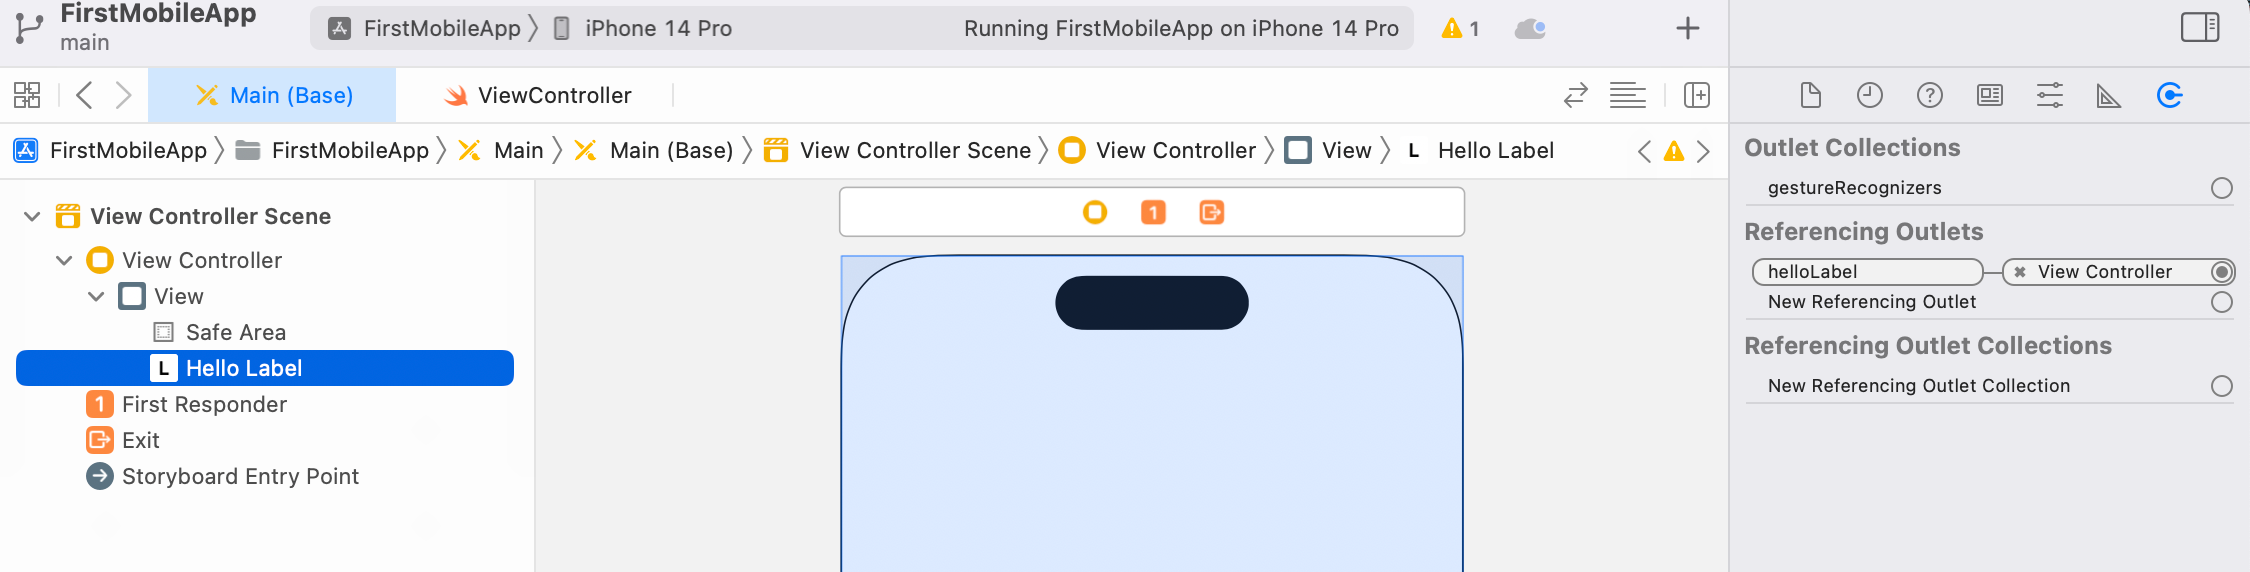
After adding that outlet to our code, the next step is to make a connection from the storyboard. Go back to the Main storyboard, click the Hello! label on the right hand side, and then select the Connections inspector, which is the last icon on the top nav of the right hand side.
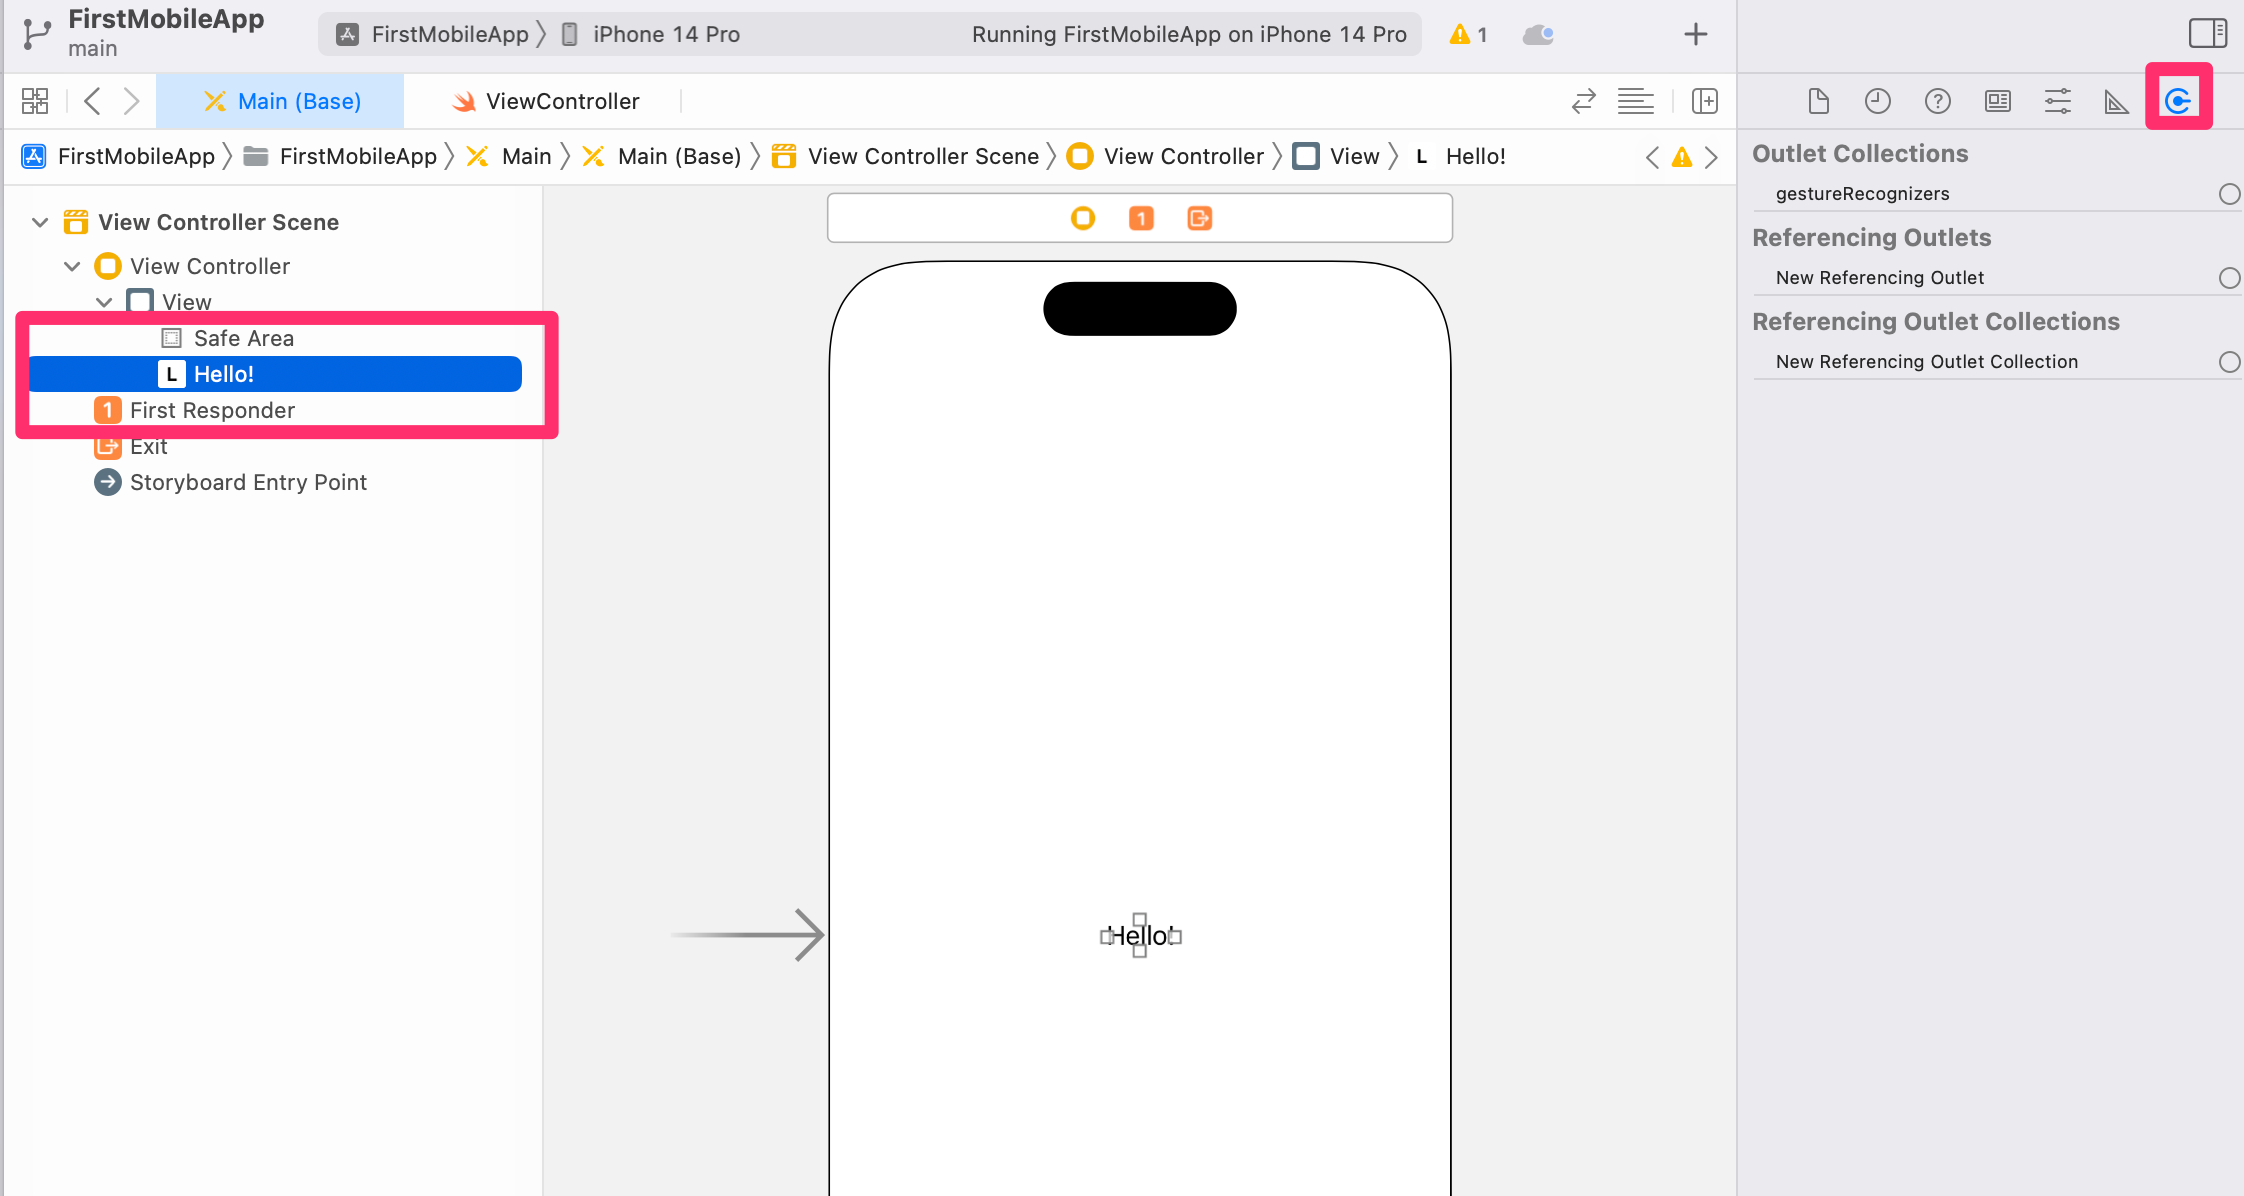
Under a heading named Referencing Outlets, you will see a circular outline next to New Referencing Outlet. This shows that there are no outlets connected between the storyboard and the underlying view controller (ViewController). We added an outlet property to the ViewController class, but this is where we need to go to make the connection.
Click on the circle outline, leave the mouse button pressed down, and then drag all the way over to the View Controller in the outline on the left.
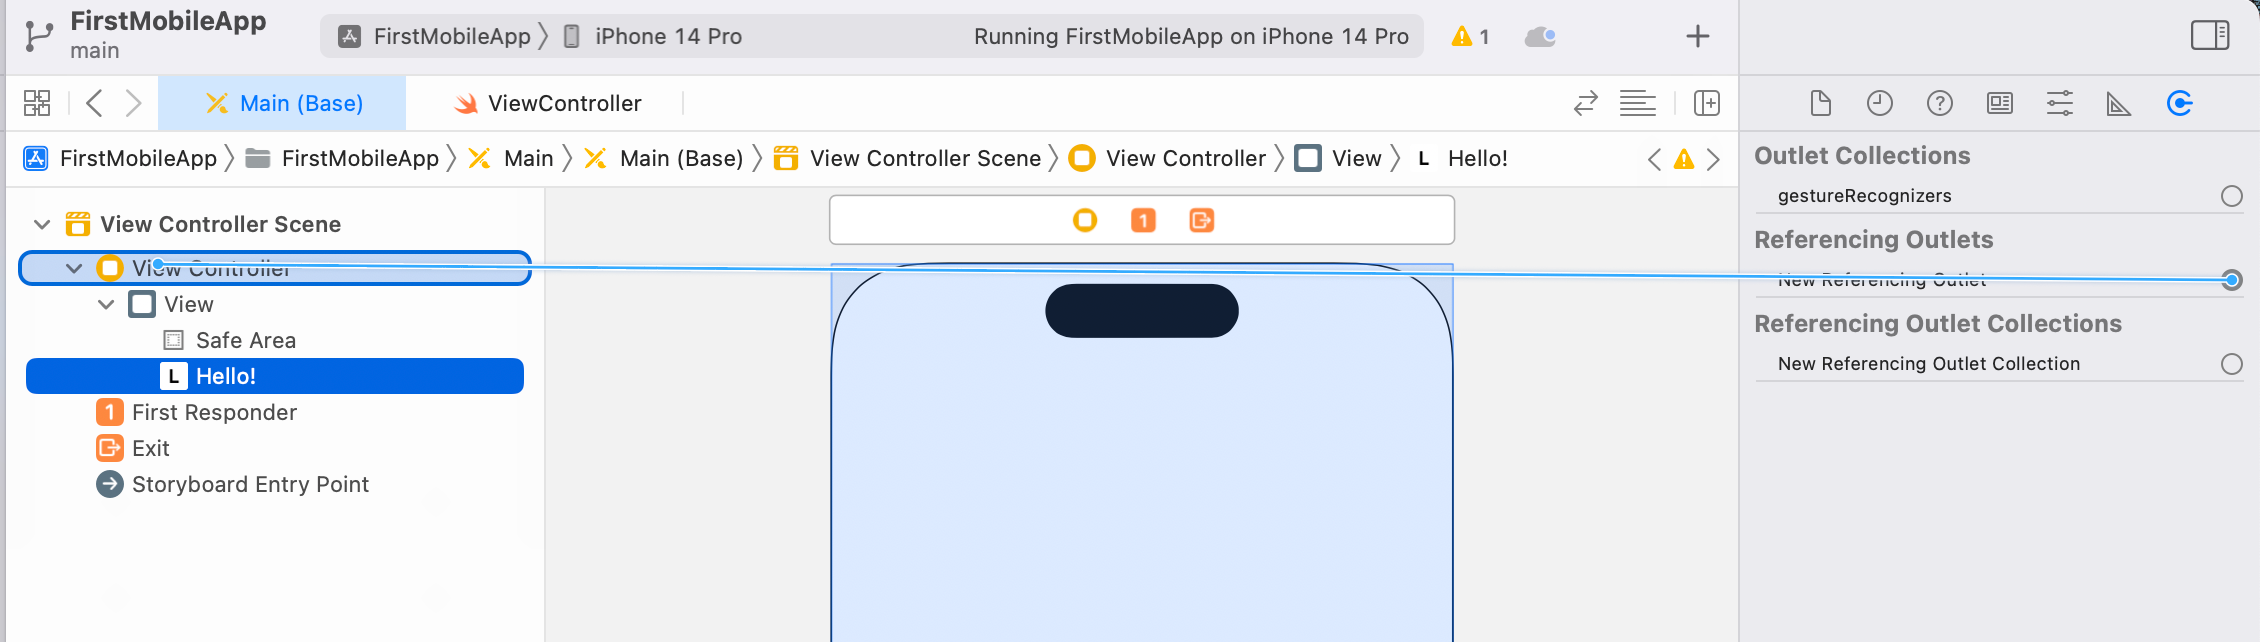
Release the mouse button, and a popup menu will appear over View Controller that has two entries - helloLabel and view. These correspond to the the two outlets that are defined on the ViewController class.
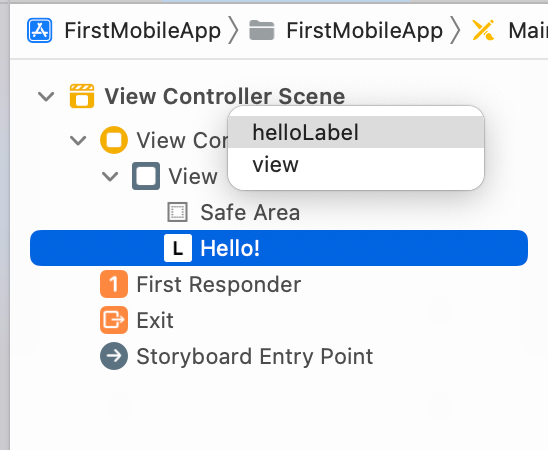
The helloLabel outlet is the one you just added, so choose that one.
After successfully connecting the outlet, you will see two changes - the outline will show "Hello Label" instead of "Hello!", and the helloLabel outlet will show as a connection in the Connections inspector.
With a connection, we can actually make a reference to that label in our Swift code.
Changing the contents of a label
Inside the ViewController class, we can add some code to change how the label on our screen behaves. We're going to go ahead and make some more changes to the viewDidLoad method.
Now that we have an outlet connected, we have a reference to our label in the helloLabel variable. There are many different attributes we can change about that label to make it display differently, but the most important one is probably text, which is the plain text the label displays.
In the following code snippet, we tell the label to say "Hi", and then change the text color used to yellow.
    override func viewDidLoad() {
        super.viewDidLoad()
        // Do any additional setup after loading the view.
        view.backgroundColor = .blue
        helloLabel.text = "Hi"
        helloLabel.textColor = .yellow
    }
Make the above changes, and then run the app in the Simulator again.
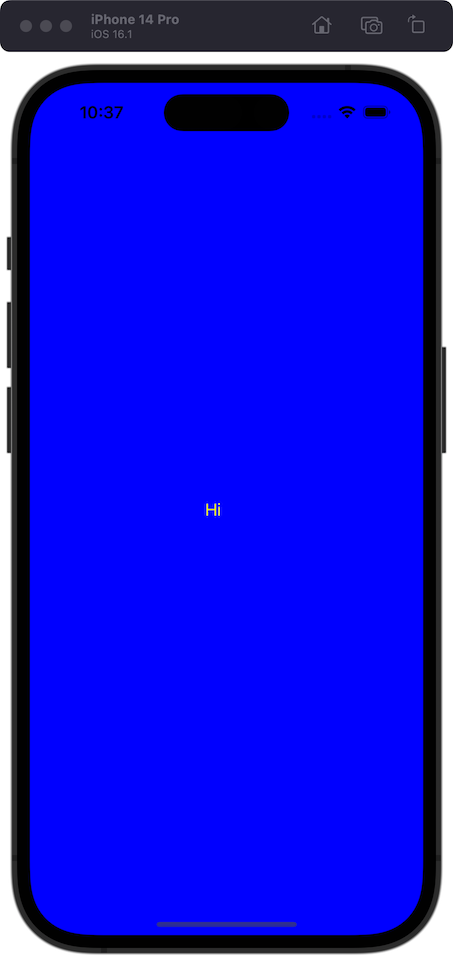
You can see that the text being displayed by the label changes, and the color has changed.
Now, we should make our iOS application a little more interactive, and add a button to the screen.
Adding a button
We can add a button to the screen the same way we added a label. Click the + button in the top navigation bar for Xcode, and then select "Filled Button" from the list.
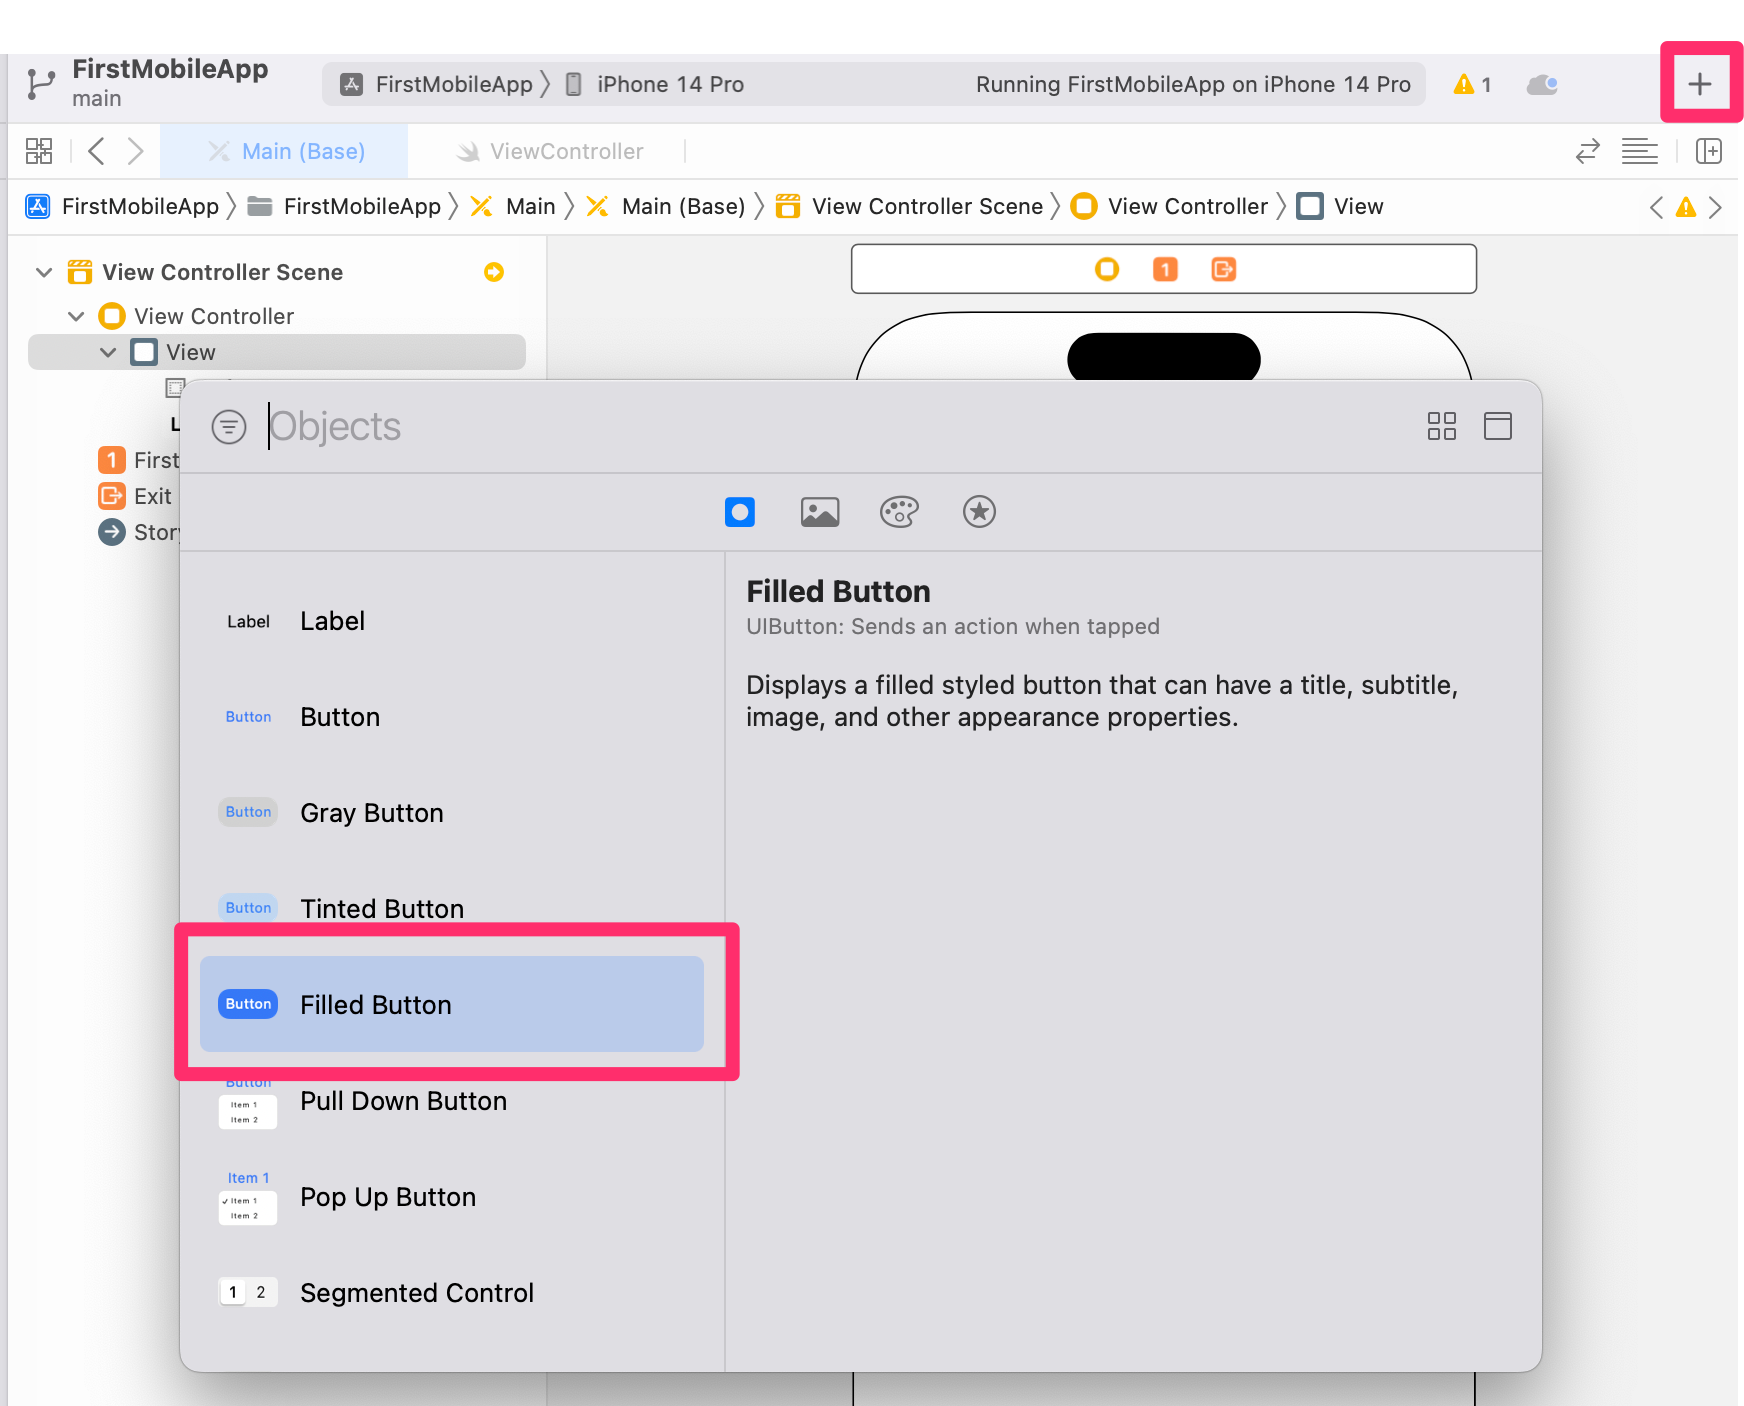
Click and drag that filled button underneath the label - it doesn't have to be exactly centered.
Note - we can center and align user interface elements like buttons and labels using a technology named Auto Layout - that isn't covered in this tutorial.
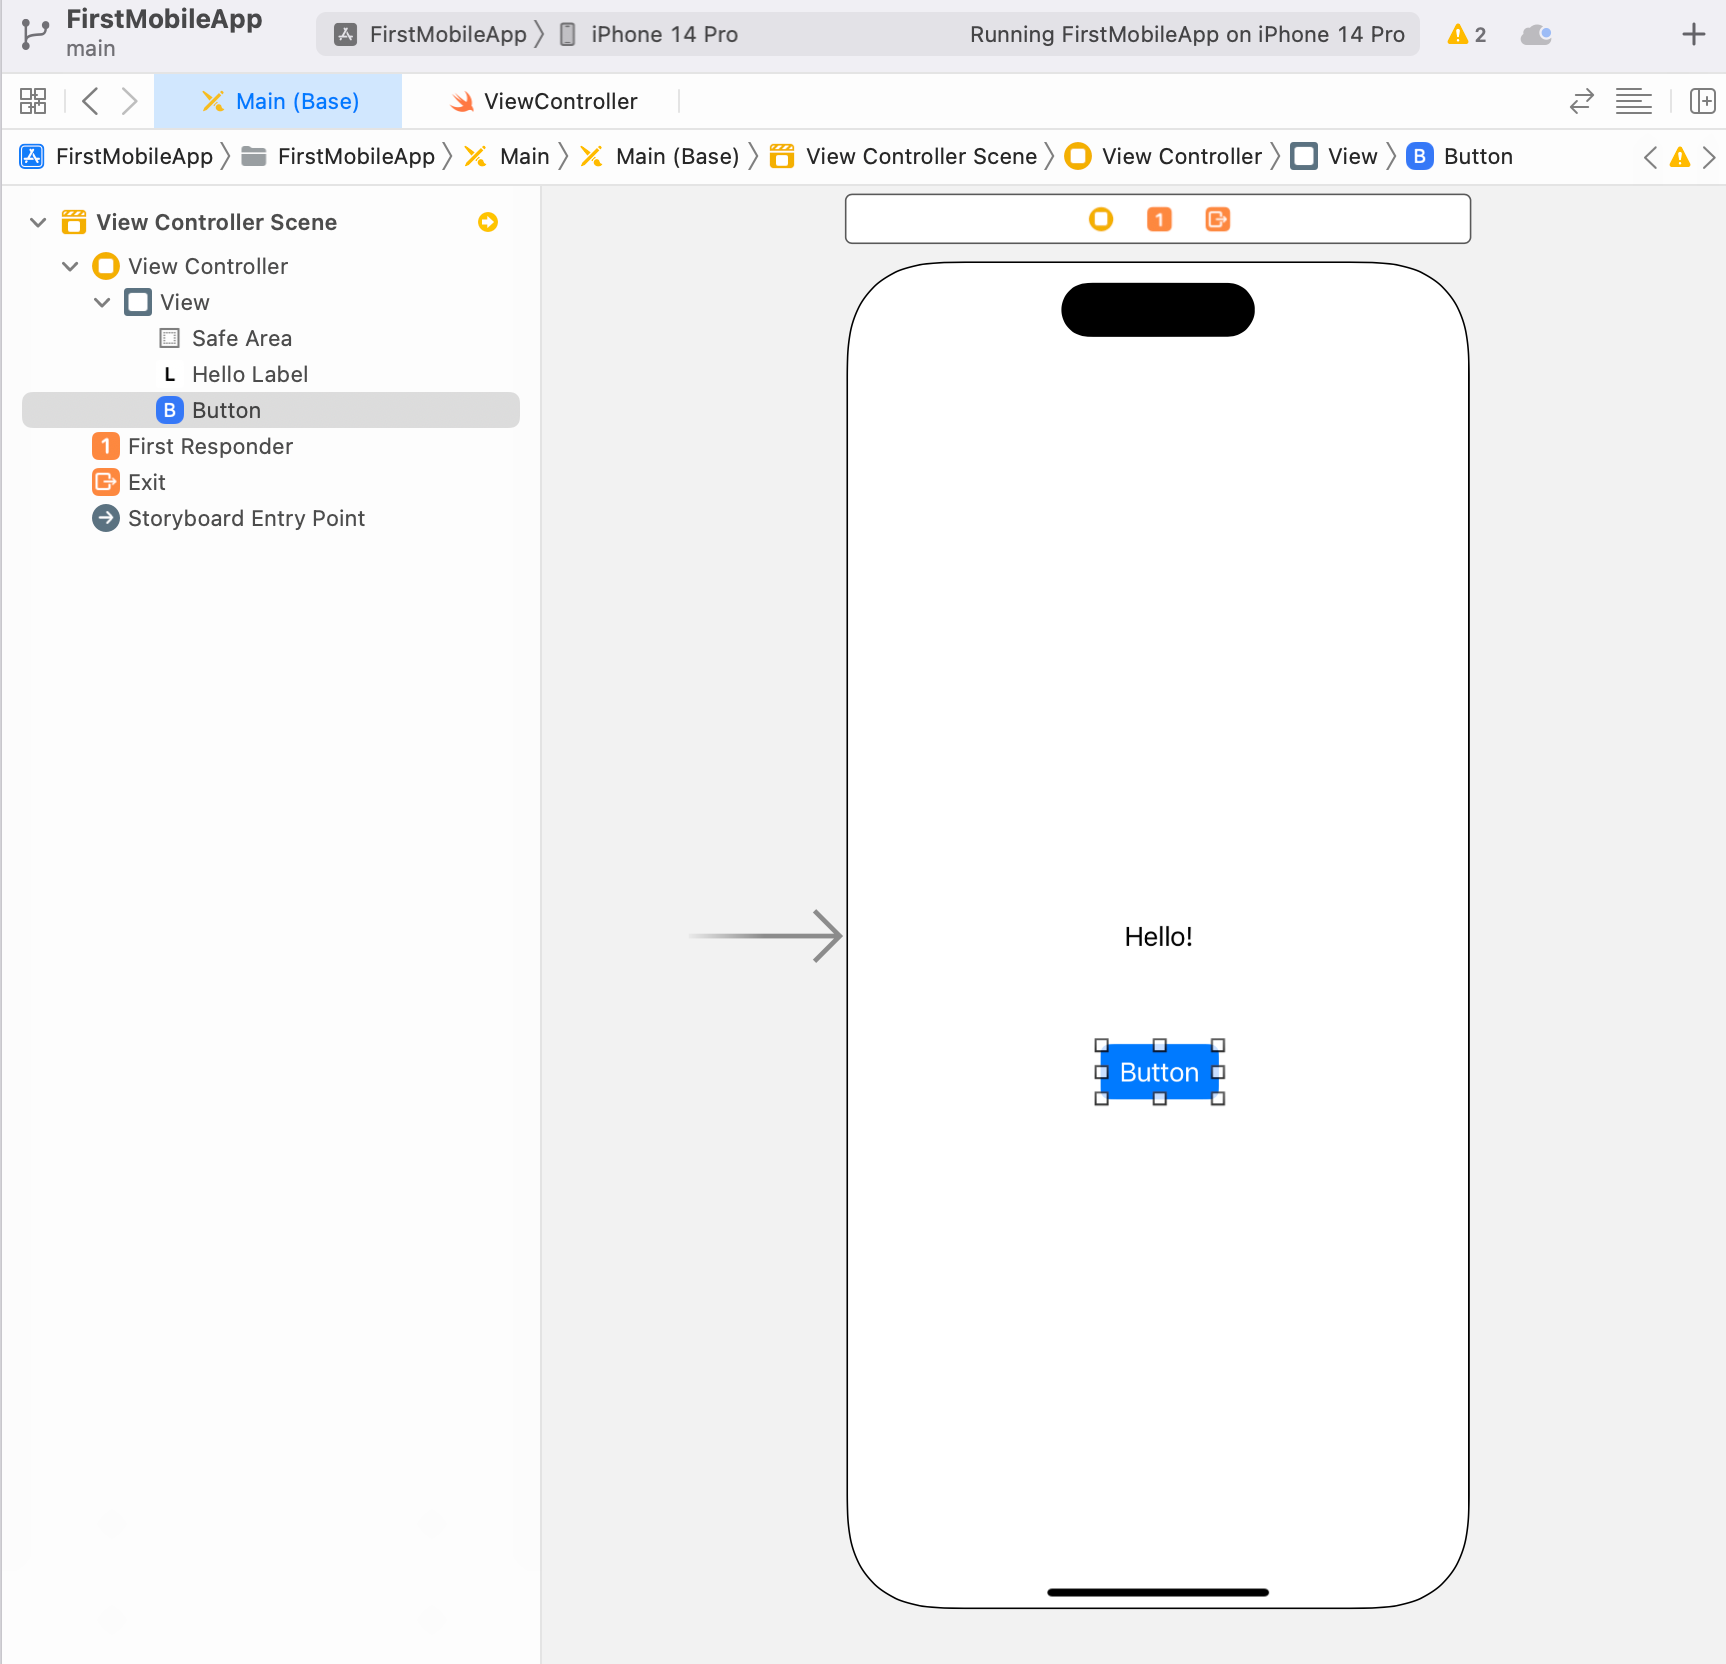
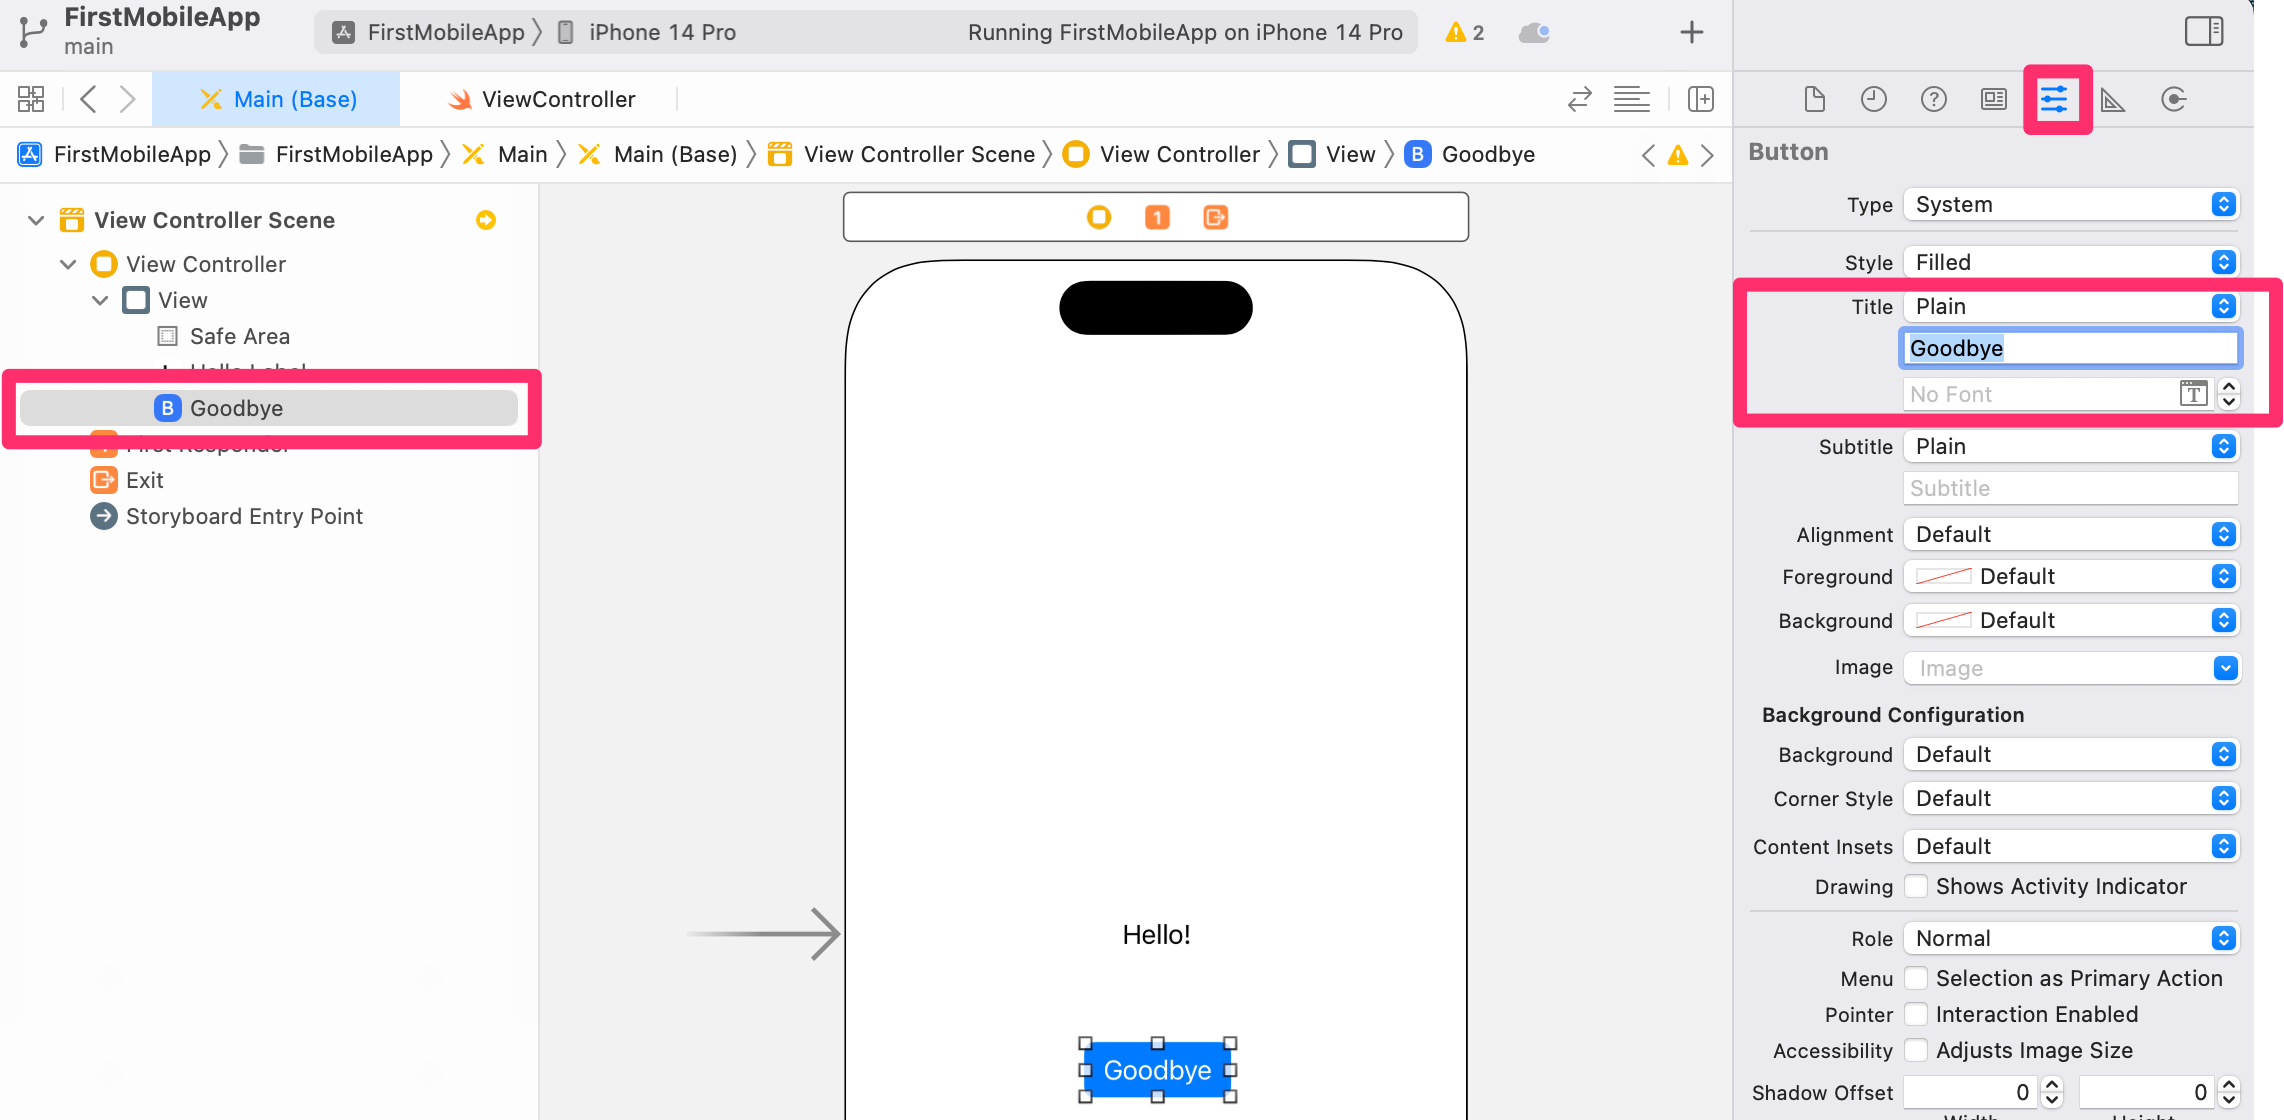
Now, let's change the text on the button. Select the button on the storyboard if it isn't already selected. Open the Attributes Inspector (5th icon on the top of the right hand column) and change the title of the Button from "Button" to "Goodbye".
Make the button do something
As it stands, if you were to run the application, clicking or tapping on the button would not do anything.
We need to write some Swift code (in a function) to run when someone taps on the button, and then we need to connect that function to the button in the storyboard.
Generally speaking, we can connect the button in the storyboard to a function in the view controller by defining an action, using the @IBAction annotation in front of the func keyword. These actions are equivalent to verbs - think of tapping a button, or changing the value on a slider.
Add a new function named goodbyeButtonTapped to your ViewController class:
import UIKit

class ViewController: UIViewController {

    @IBOutlet var helloLabel: UILabel!

    override func viewDidLoad() {
        super.viewDidLoad()
        // Do any additional setup after loading the view.
        view.backgroundColor = .blue
        helloLabel.text = "Hi"
        helloLabel.textColor = .yellow
    }

    @IBAction func goodbyeButtonTapped() {
        helloLabel.text = "Bye"
    }
}
Inside the function, we only have one line of code that actually does anything - we set the text of the helloLabel label to "Bye".
Notice the @IBAction annotation that precedes the func keyword. That marks this function as one that the objects in the storyboard can be connected to. Let's go ahead and do that as the last step in this guide.
Connecting an action in the storyboard
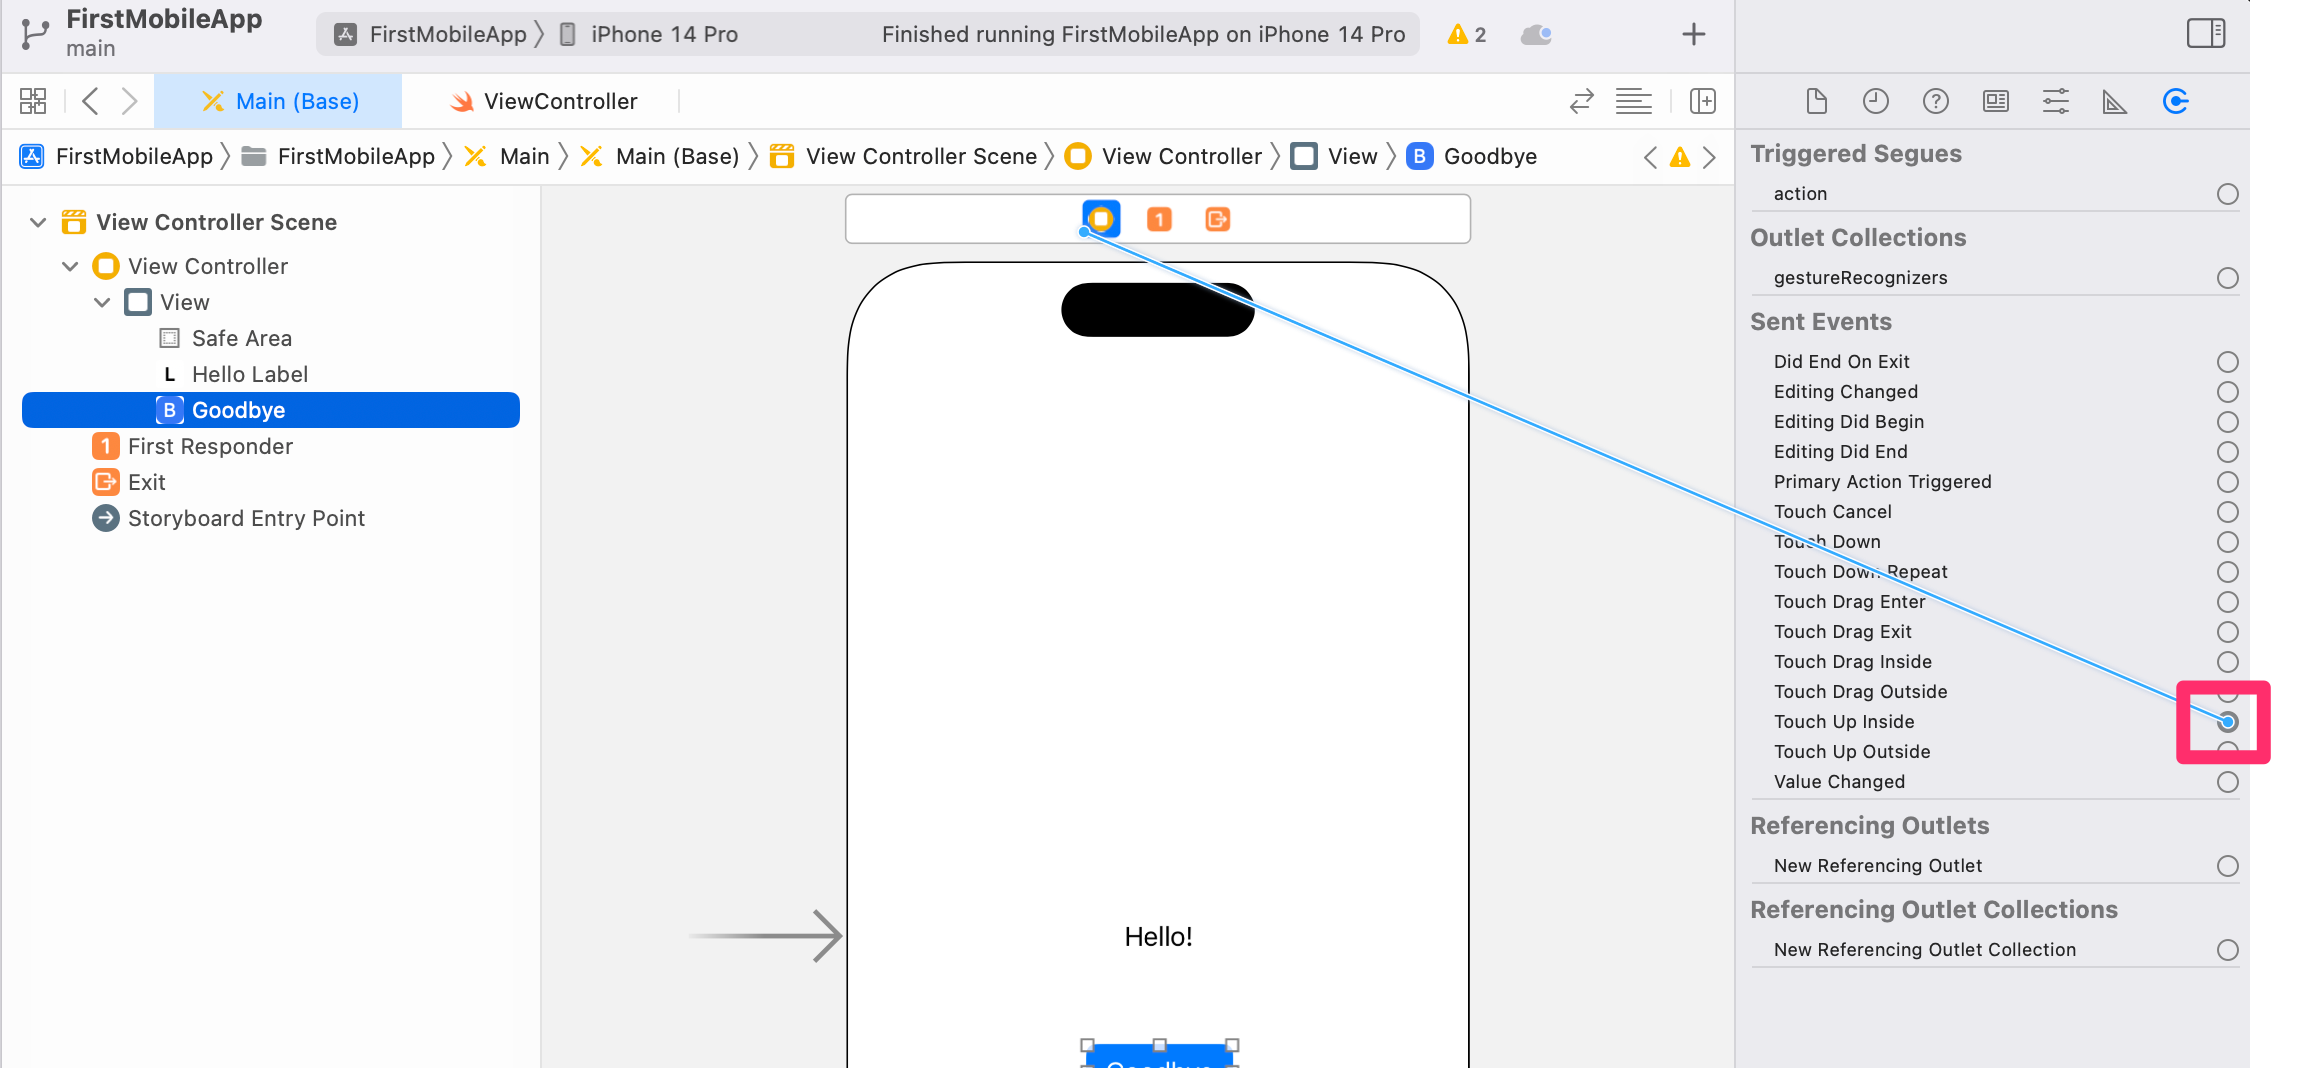
Go back to the Main storyboard, and select the "Goodbye" button. Change the right hand view to the Connections Inspector (the last icon), and then take a look at the list of Sent Events.
When working with a button, you will typically want the "Touch Up Inside" event, which signifies that someone tapped on the button.
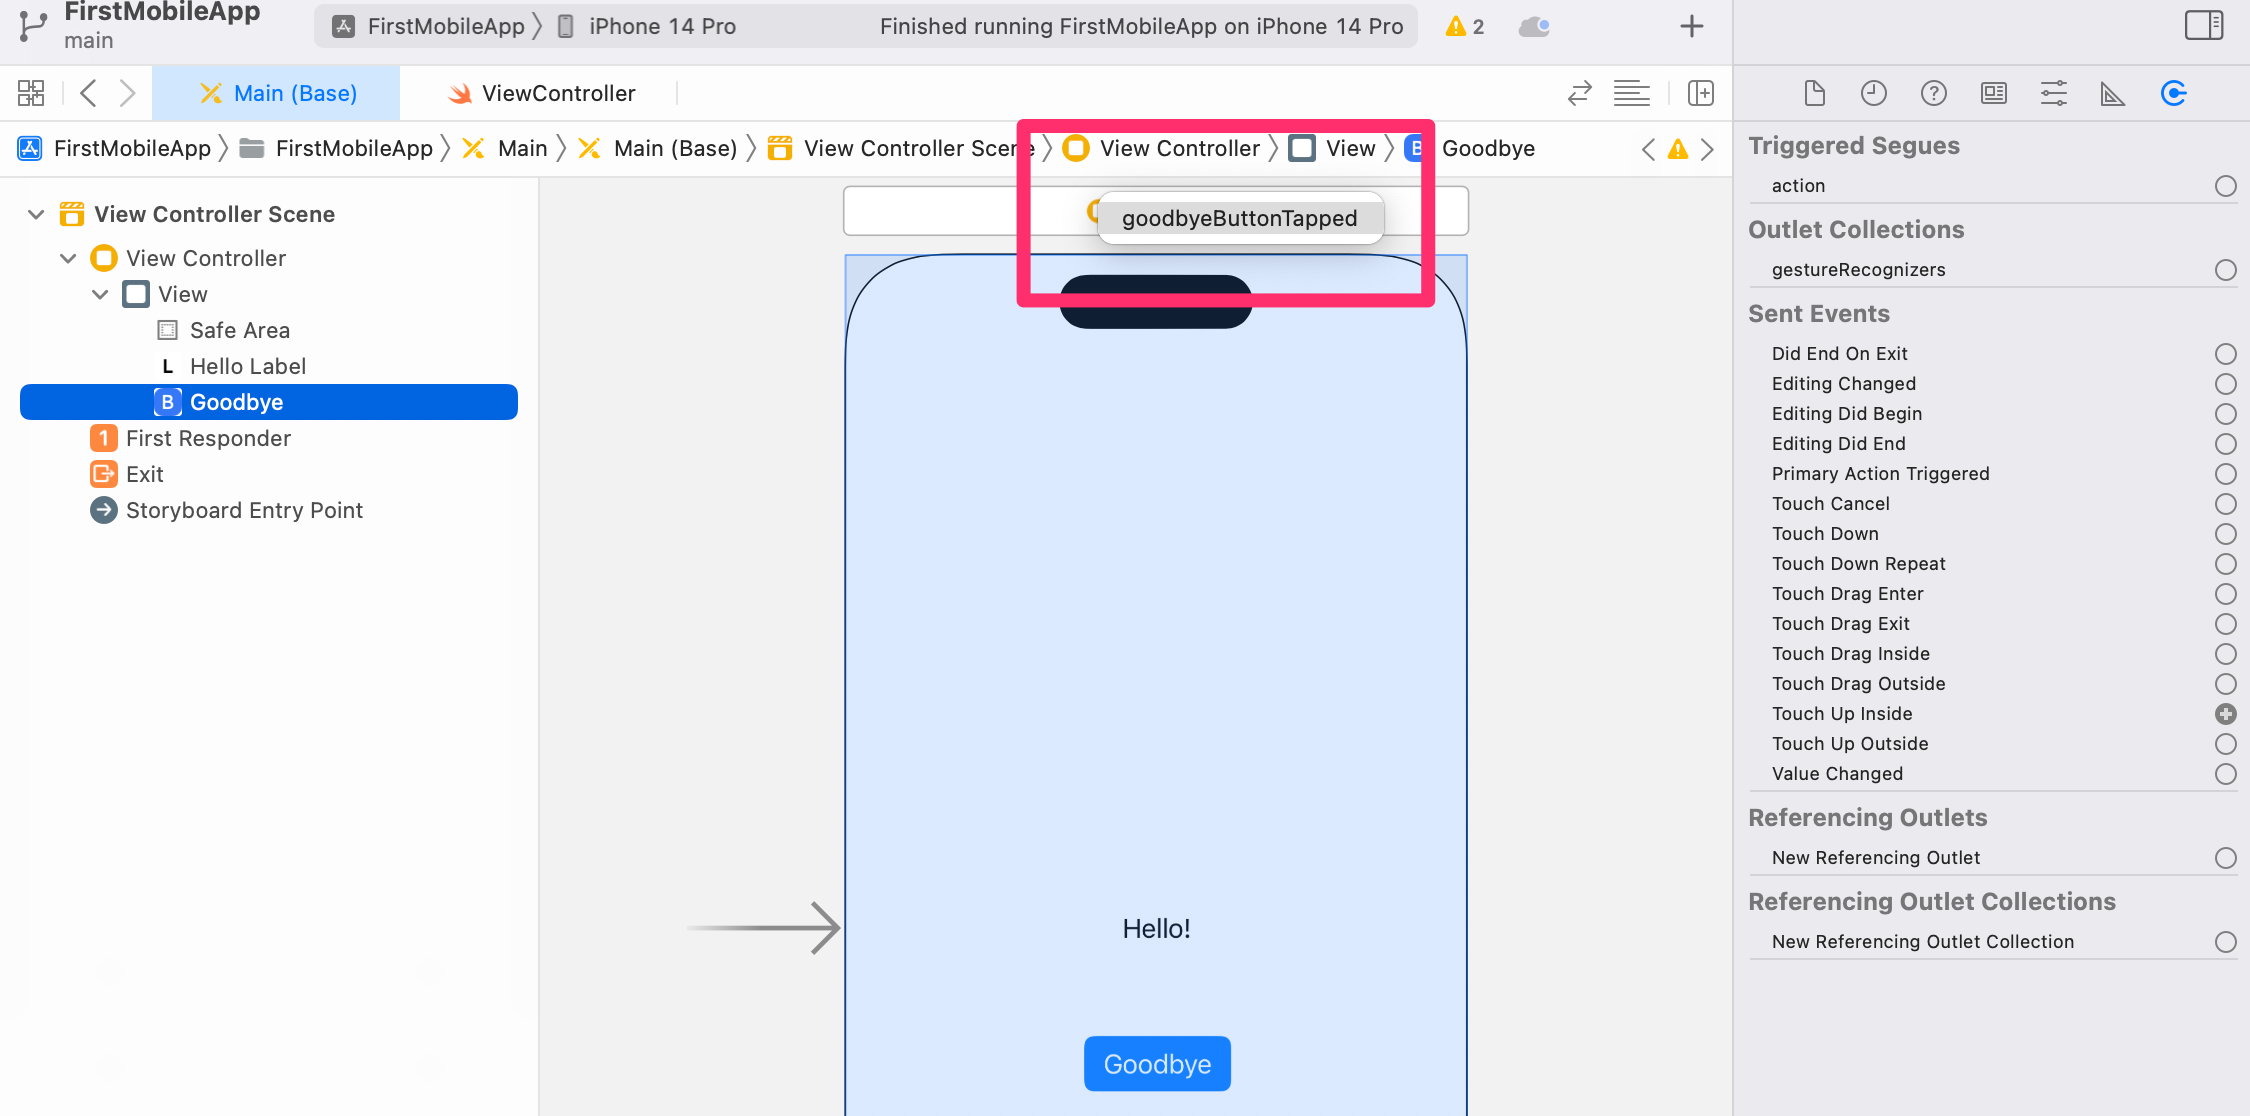
The first step in making the connection for an action is to click on the circular outline next to "Touch Up Inside". Hold down the mouse button, and then drag a line over to the little yellow circle with a square in it above the app screen. You can also drag over to the "View Controller" in the outline to the left of the app screen.
After you successfully drag the line over, release the mouse button, and a small popup menu will show in Xcode with the names of all Interface Builder actions (IBActions) on the ViewController class. We only have one, the one we just added, so pick goodbyeButtonTapped from the menu.
If everything worked, we'll see a connection in the Connection Inspector in the right hand sidebar.
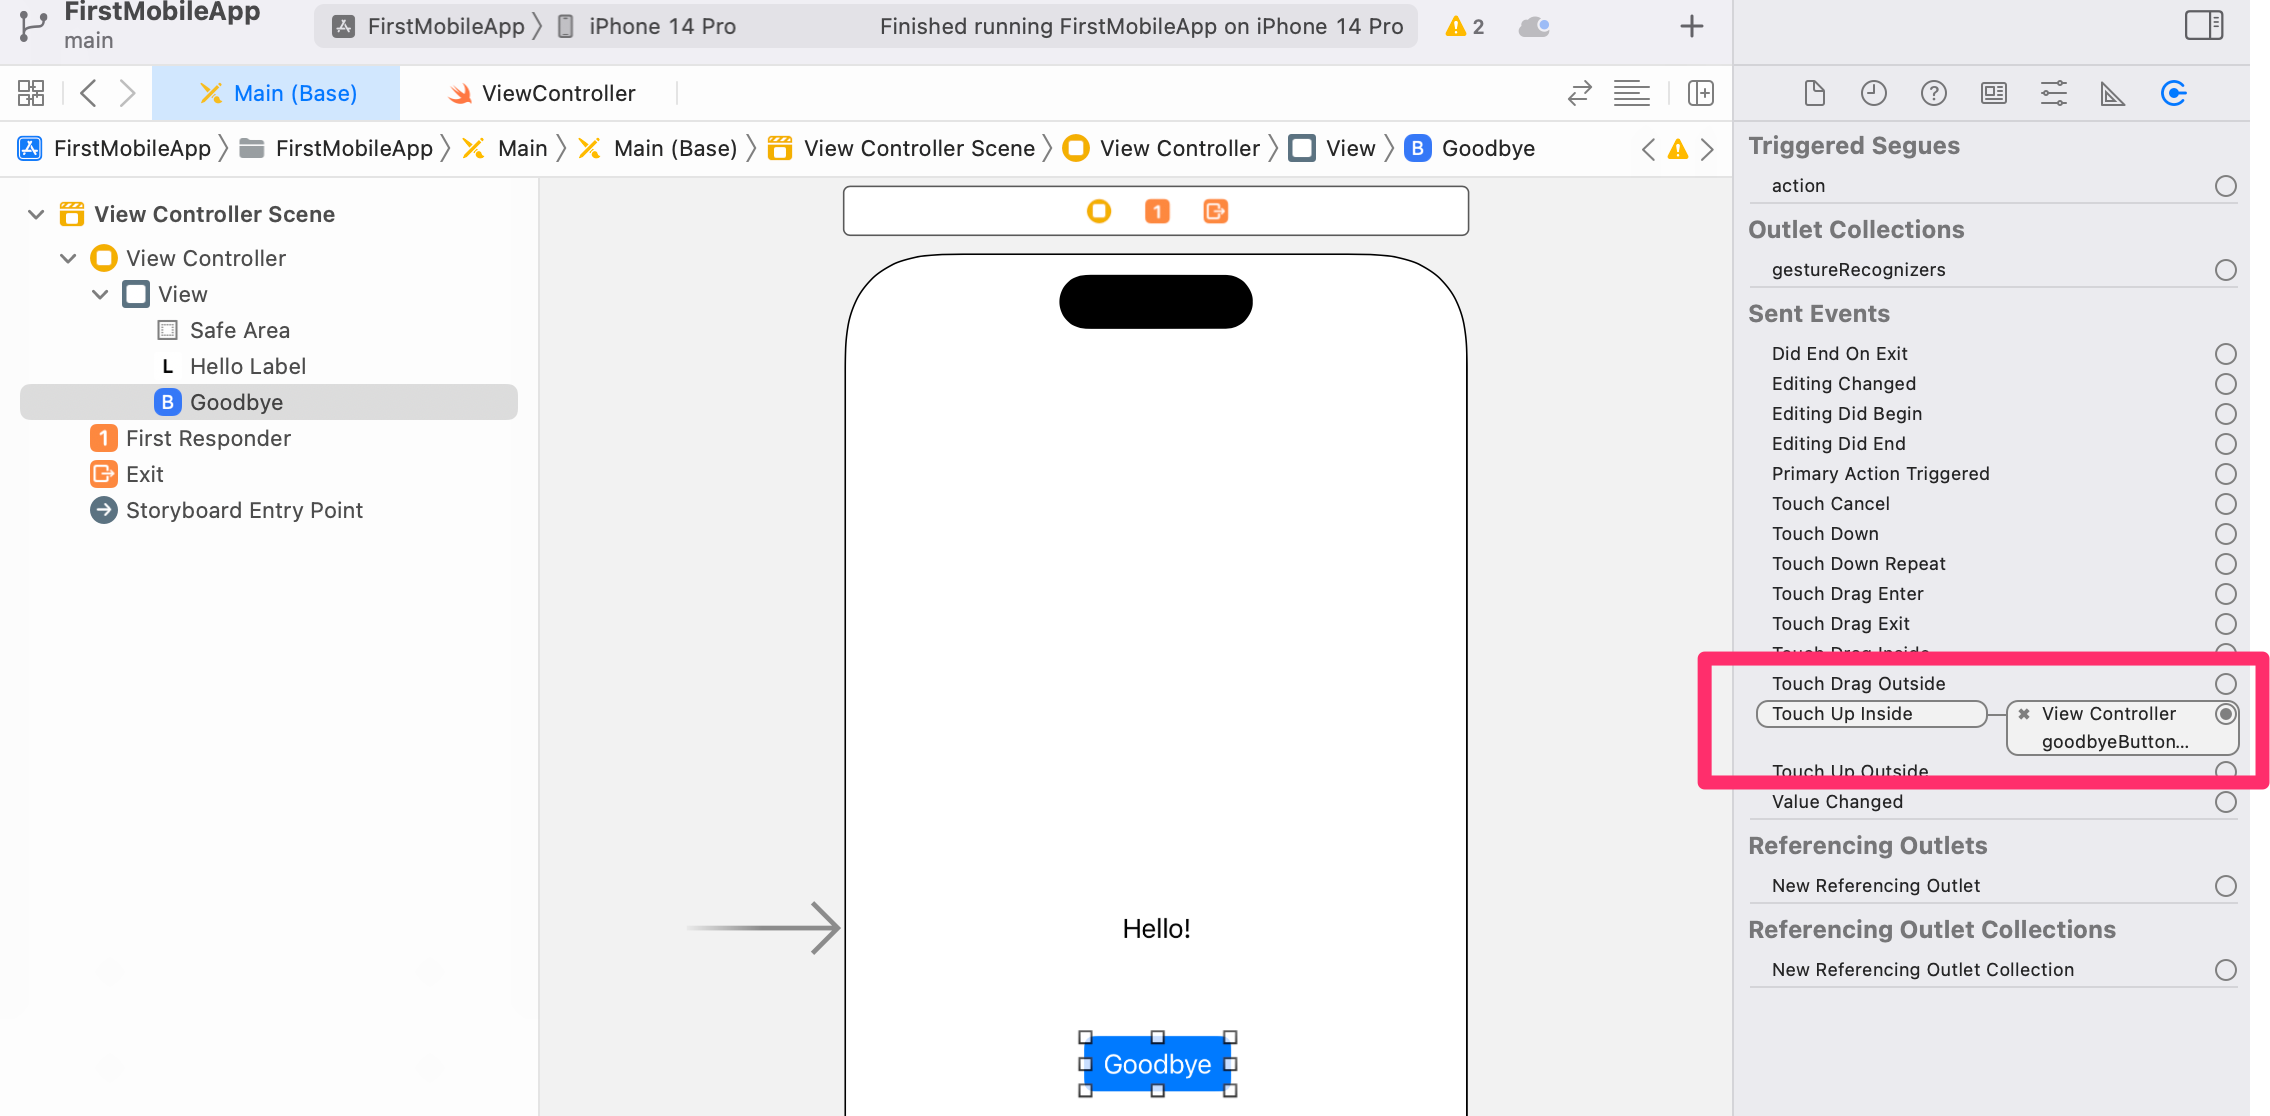
If yours isn't quite right, you can delete a connection by clicking the little "X" that you see next to the View Controller connection.
Otherwise, go ahead and run your app again, and then press the button!
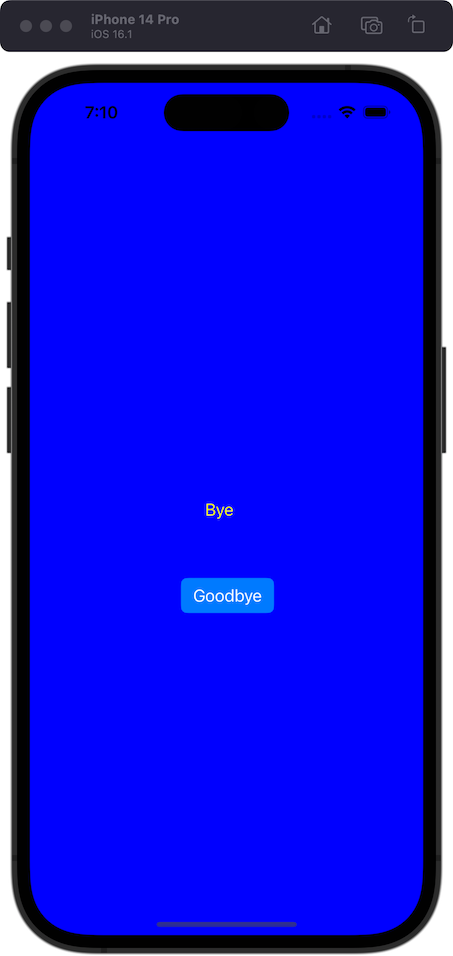
You should see the word "Bye" on the label if all was successful. Great work!
Conclusion and Next Steps
This tutorial covered some of the ways to work with storyboards when developing apps for iOS. You've seen how to use outlets and actions to make connections between your Swift code in the view controller, and the user interface drawn in a storyboard.
Some of the things to learn after this tutorial are:
- Auto Layout to display your user interface elements on any size phone or tablet screen
- Working with multiple screens using navigation controllers
- Organizing your application with multiple storyboard files
Thanks, and if you have any questions, reach out to me at jlinwood@gmail.com